Automate Your Contact Management: How to add new Klaviyo Profiles as Capsule Contacts
Klaviyo is an AI-based B2C CRM that offers email marketing, service and analytics in one solution. With the help of an Automation tool, you can add new Klaviyo Profiles as Capsule Contacts. This article will walk you through how to do this using Zapier or Make.
A Capsule CRM account: An active Capsule CRM account
A Make.com or Zapier account
How to set up the Klaviyo to Capsule Automation
Click on the tabs below to view the instructions for your chosen Automation tool:
How to set up the Klaviyo to Capsule Zap
This zap will help you automate the process of adding a new Contact to Capsule each time there is a new Profile in Klaviyo.
We have created a template to make the process as simple as possible. Click on the Zapier link below to load the Klaviyo Template:
It’s always a good idea to give your Zap a name, that way it’s easier to reference and find at a later stage. You’re able to update the name from the top of the Zap configuration page.
Zap Trigger: New Profile
The first step is to define the trigger, which will be when there is a new Profile in Klaviyo. You should be directed to this step in the template - but if not, click on the tile for New Profile
In the Account field on the same page, choose Sign In to link Zapier to Klaviyo. You will be asked to give Zapier specific permissions, choose Allow to complete the connection
3. When directed back to Zapier, choose Continue
4. At this point, you will be asked to Test your Trigger. Use the Test Trigger button to complete the check - here you will be able to see examples of your new Profiles in Klaviyo.
Select one of the examples, then choose Continue with selected record
You’ll need to ensure that you have at least one historical Profile in your Klaviyo account. If not, please go back and add dummy data for the purpose of creating this Zap.
Zap Action: Find Capsule Contact
1. Now we can check if the Contact already exists in Capsule, and if not, then create it. If you're not redirected automatically, click on the tile for Find Contact
2. In the Account field, choose your Capsule account. If you’ve set up a Zap for Capsule earlier, you’ll be shown an existing account. Or follow the instructions to link your account and click Continue
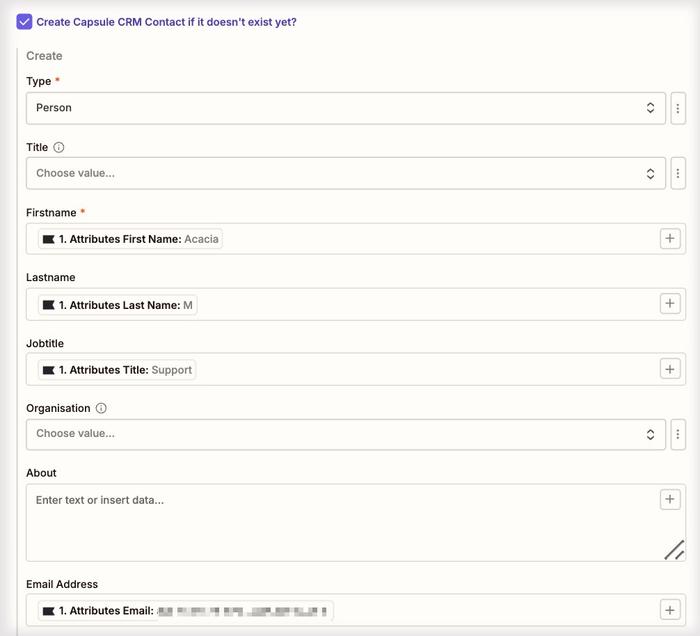
3. On the Configure tab, make sure the box is checked to “Create Capsule CRM Contact if it doesn’t exist yet?”
5. Fill in the details for the Contact that will be created if it doesn’t exist in Capsule. The email address should already be populated for you.
This step is important because here you’re mapping the relevant fields from Klaviyo to the correct Fields within Capsule. The First Name is a required field, and any Custom Fields will need to be set up in Capsule before integrating with Klaviyo.
6. Optional Step - A tag can also be added to any newly created Contacts, so Contacts newly added from Klaviyo can easily be identified and filtered within Capsule. This is also handy if you have new Contacts being created from other sources too, to see which tool it was created from.
You can see below that we have created a tag within Capsule called Klaviyo. This tag will be added to all Contacts that are added to our Capsule by this Zap.
Once you’re happy with the configuration, click on the Continue button
7. At this point, you will be asked to test your step. Use the Test Step button to complete the check. If the Contact isn’t already in Capsule, this will create it for you. Below you will find a screenshot of how this would reflect a new Contact added to Capsule:
8. If it all looks correct, click the Publish button to save your changes and push your Zap live.
This activates the integration, and from this point onward, any new Profile in Klaviyo will automatically be added to Capsule if they don’t already exist.
Regularly monitor the Zap's performance in your Zapier dashboard to ensure it is working as expected. Make any necessary adjustments based on your workflow needs.
How to set up the Klaviyo to Capsule Scenario
This Make Scenario will help you automate the process of adding a new Contact to Capsule each time there is a new Profile in Klaviyo.
When a new Profile is created in Klaviyo, a search is performed in Capsule.
If the subscriber doesn’t exist in Capsule, they will be added as a new Person record.
If the subscriber already exists, a Note will be added to their record instead.
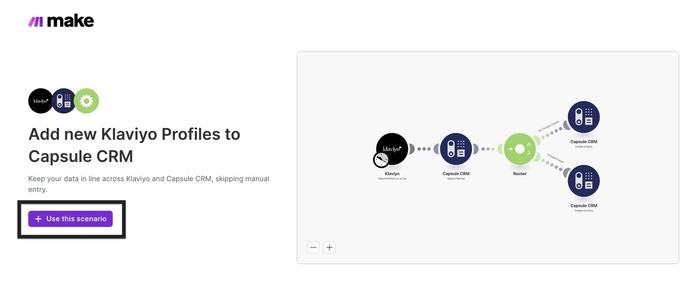
We have created a template to make the process as simple as possible. Click on this link to take you to the landing page: Add new Klaviyo Profiles as Capsule CRM Contacts, then choose + Use this Scenario to load it.
You will be prompted to log in to your Make account. If you don't have an account, you can sign up here - Make.com.
It’s always a good idea to give your Scenario a name, that way it’s easier to reference and find at a later stage. You’re able to update the name from the top left of the edit page.
Find new Klaviyo Profiles
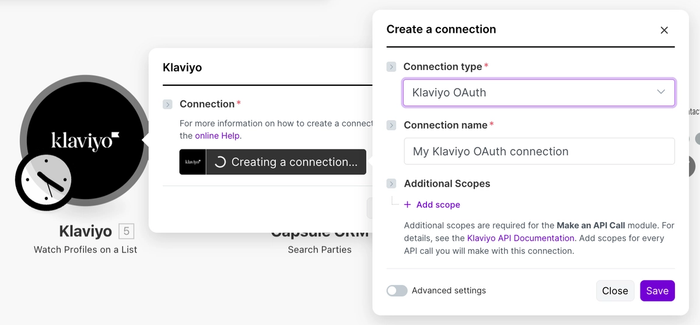
The first step is to watch for a new Profile in Klaviyo. Click on the Klaviyo module (first circle on the left) and choose Create a Connection
In the Connection type drop-down, select Klaviyo OAuth, and give your connection a Name to easily identify it
3. Choose Save to link Make with Klaviyo. A new window will open at this point, where you can enter the login details for your Klaviyo account.
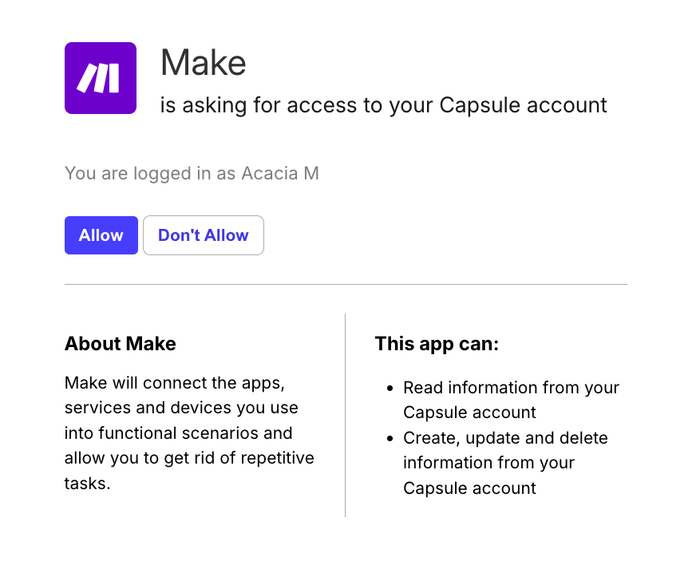
You will also be asked to give Make specific permissions, choose Allow to complete the connection
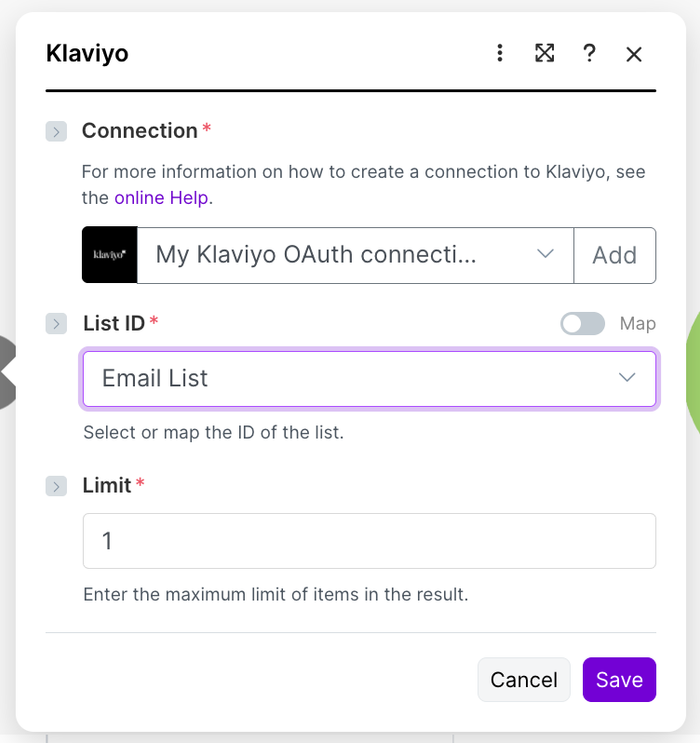
4. When directed back to Make, select the Klaviyo Connection you created in the previous step. At this point, you can also select your chosen List (Email, SMS or Preview). The Limit field will already be populated for you.
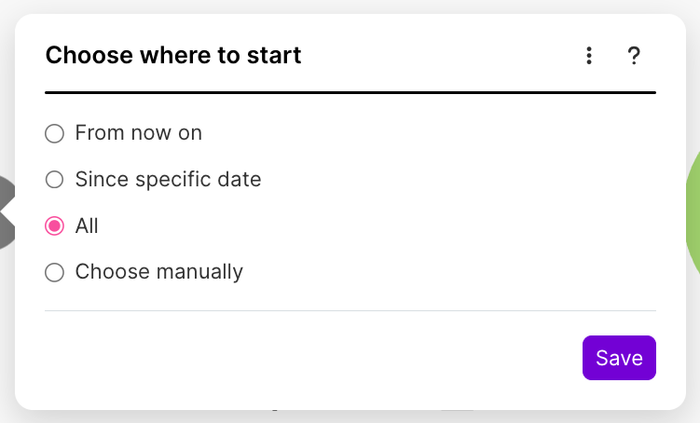
5. After clicking Save, you can choose when to start picking up new Klaviyo Profiles. In this example, we have selected to pick up them All.
Select Save to complete this step.
Find Capsule Contact
1. Now we can check if the Contact already exists in Capsule. Click on the Capsule CRM (Search Parties) module.
2. In the Connection field, follow the steps to choose your Capsule account. When prompted for permissions, choose Allow.
3. Check that the search field is pre-populated with the Attributes: Email field from Klaviyo, then select Save.
Create Capsule Contact
Now we can set up the creation of the Capsule Contact if it doesn't already exist. Click on the Capsule CRM (Create a Party) module.
In the Connection field, use the drop-down to select your Capsule account.
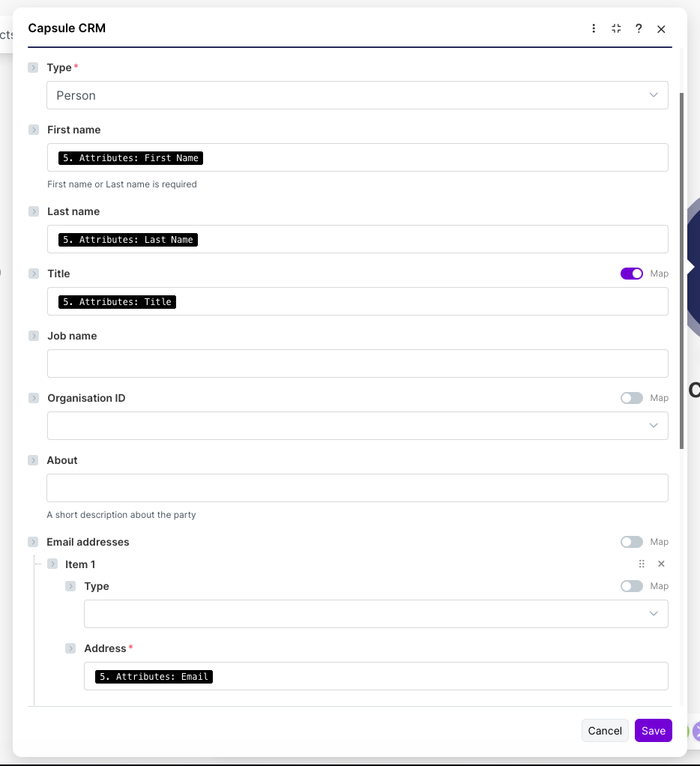
Fill in the details for the Contact that will be created if it doesn’t exist in Capsule. The First Name, Last Name and Email address should already be populated for you.
This step is important because here you’re mapping the relevant fields from Klaviyo to the correct Fields within Capsule. The First Name or Last Name fields are required, and any Custom Fields will need to be set up in Capsule before integrating with Klaviyo.
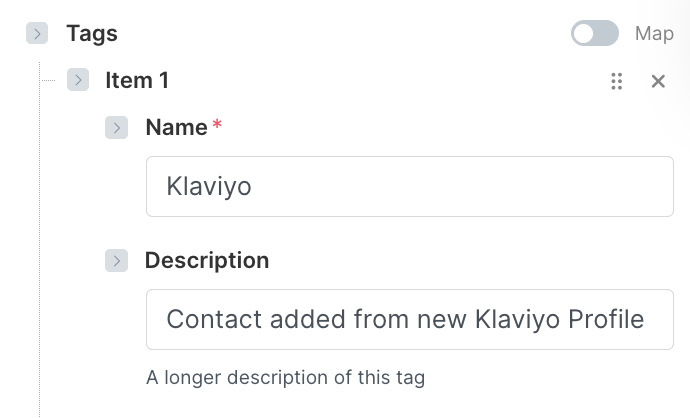
4. Optional Step - A tag can also be added to any newly created Contacts, so Contacts newly added from Klaviyo can easily be identified and filtered within Capsule. This is also handy if you have new Contacts being created from other sources too, to see which tool it was created from.
You can see below that we have created a tag within Capsule called Klaviyo. This tag will be added to all Contacts that are added to our Capsule by this Scenario.
Once you’re happy with the configuration, click on the Save button.
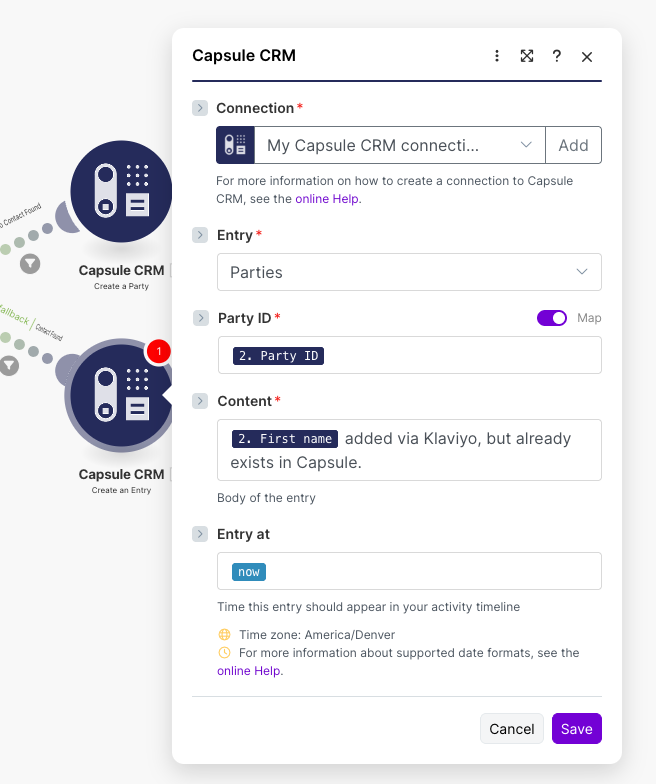
Add note to Capsule Contact
Next, we can set up to add a note to the Capsule Contact if it already exists. Click on the Capsule CRM (Create an Entry) module.
Here, you will see the Entry, Party ID and Content of your Note populated for you. If needed, you can make any changes to its content.
Once you’re happy with this setup, choose Save.
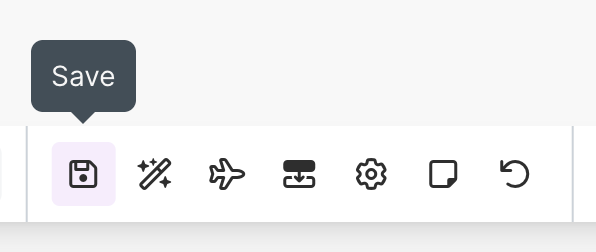
3. At this point, you will need to save your scenario using the main Save button at the bottom of the editor
Test your Scenario
1. Now you can test your scenario. You’ll need to ensure that you have at least one historical Profile in your Klaviyo account. If not, please go back and add dummy data for the purpose of creating this Scenario.
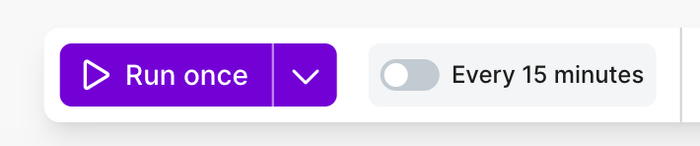
Then, use the Run Once button at the bottom of the editor.
2. If the Contact isn’t already in Capsule, this will create it for you. Below you will find a screenshot of how this would reflect a new Contact added to Capsule:
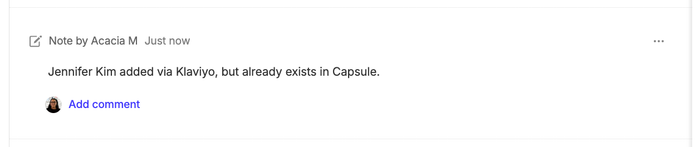
Or, if the Contact is already in Capsule, you should see the note added to it:
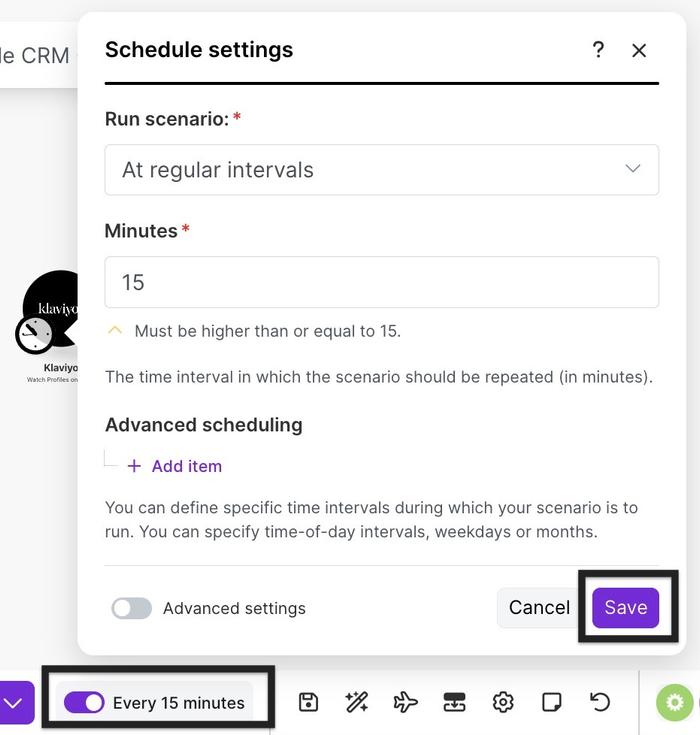
3. If it all looks correct, you can turn your Scenario on, using the Every 15 Minutes button (at the bottom of the editor). Then select Save.
This activates the Make Automation, which will check every 15 minutes. From this point onward, any new Profile in Klaviyo will be added to Capsule if they don’t already exist.
Check the History tab in the Scenario dashboard to ensure the scenario is running without errors. Make any necessary adjustments based on your workflow needs.
Benefits of this Integration
Time Efficiency: Automates the transfer of Contact information from new contacts in Klaviyo, saving time on manual data entry.
Accuracy: Reduces the risk of data entry errors, ensuring that Contact details are accurately captured.
Productivity: Streamlines the process of updating Capsule CRM, allowing you to focus on more critical tasks such as customer engagement and follow-up.
Seamless Workflow: Maintains an up-to-date and organised Contact database, enhancing your CRM's efficiency and effectiveness.