If you're using Outlook for Microsoft 365 then you can install the Capsule Add-in for Outlook. The Add-in makes it really easy to add contacts, store and track email conversations and create Tasks, Projects & Opportunities, all without leaving your inbox.
Once you start tracking an email conversation from Outlook using the Add-in it will keep tracking all future messages in that conversation - saving you from having to store each individual back and forth message. It’s a big time saver and helps you keep all your important communication stored in Capsule.
How to install the Capsule Add-in for Outlook
Any Microsoft 365 user can install the Capsule Add-in for Outlook from Outlook. To do that you would follow these steps:
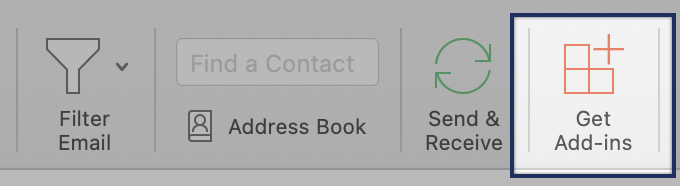
Click on the Get Add-ins button in the top "Ribbon".
2. On the modal that opens up, search for Capsule and then click the button to Add it.
3. Alternatively you can use this direct link to get the Capsule Add-in.
4. You'll be asked to confirm that you agree to the terms. Click Continue and then you're done.
Connecting the Outlook Add-in to your Capsule account
When the Add-in is installed, Capsule will be available to select from the More actions menu whenever you view an email. Once opened, you can use the push pin button to "pin" it so that it stays open every time you view an email.
- When viewing an email conversation, use the More actions menu to expand the Capsule Add-in.
- The Add-in will guide you through an installation process. First you need to connect it to your Capsule account. Click the button to Connect your Capsule account and follow the steps to authenticated to your Capsule account.
- After connecting to your Capsule account you also need to grant Capsule access to your Microsoft 365 account. Click the button to Grant access to Microsoft 365 and follow the steps to accept the permissions. You’ll only need to do this once. The next time you access the Add-in it will remember your permissions.
At this point you can start using the features of the Add-in. When an email comes in for a new contact you can add the contact to Capsule and then start storing the email. When you start storing a conversation, the email along with all future emails (both back and forth) in that same thread will be stored in your Capsule account.
How to use the Capsule Add-in for Outlook
Once the Capsule Add-in has been installed in Outlook for Microsoft 365 it’s time to start using it to add contacts, store emails and more. If it’s the first time you use the Add-in then you’ll need to connect it to your Capsule account. Once that’s done you’ll be able to start adding and storing data.
How to add the Capsule Add-in to the message surface
If you want the Capsule Add-in more easily accessible than digging into the menu, you can add it to the message surface (next to the icons for reply, forward etc.). To do this:
- Click the settings cog in top right of the window
- The settings panel will slide in on the right (close any add-ins you have open as the settings panel won't be visible). Click View all Outlook settings at the bottom of the settings panel.
- This will open a modal in the middle of the screen. Click Customise Actions from the menu.
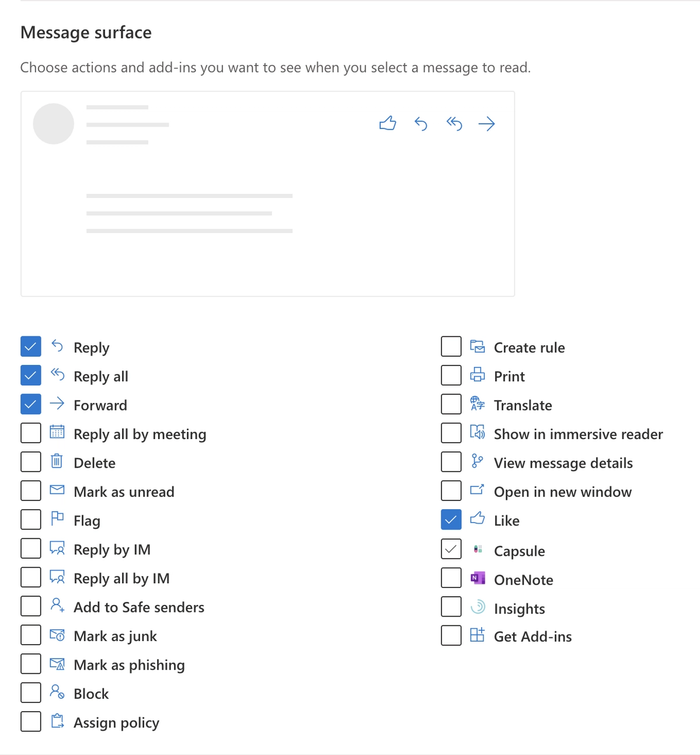
- Under the Message Surface section there will be a lot of checkboxes, of which Capsule will be one of them. Check the box and click Save. The Capsule Add-in will now be easily accessed from every email.
How to see what contacts are in an Outlook conversation
The Outlook Add-in appears in the sidebar to the right of your inbox whenever you open an email thread. We refer to email threads as conversations. A conversation can be between you and an existing contact you already have saved in your Capsule account, or a new contact you haven’t added yet.
You’ll see two kinds of contacts; new and existing:
Clicking on a new contact in the list will take you to an add contact page.

How to add a new contact with the Outlook Add-in
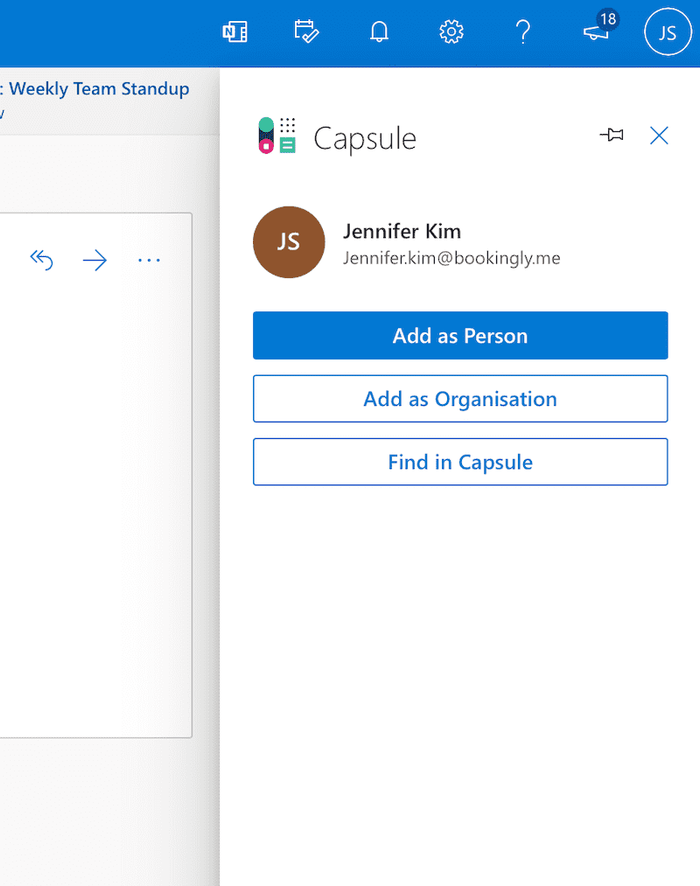
When you click on a new contact, the add-on will present you with three options:
- Add as Person will take you to the ‘Add as Person’ form. Here you can add contact details, websites and social networks to the new contact record. Click Save and the Add-in will store the new person in Capsule. You can alternatively click Save & Store Conversation and the add-on will store the contact in Capsule, and then store the conversation on that contact in one step.
- Add as Organization will take you to the Add as Organization form. Here you’ll be able to enter details specific to the organization. Click Save and the Add-in will store the new organization in Capsule. Again you can choose to click Save & Store Conversation and the Add-in will store the contact in Capsule, and then store the conversation on that contact in one step.
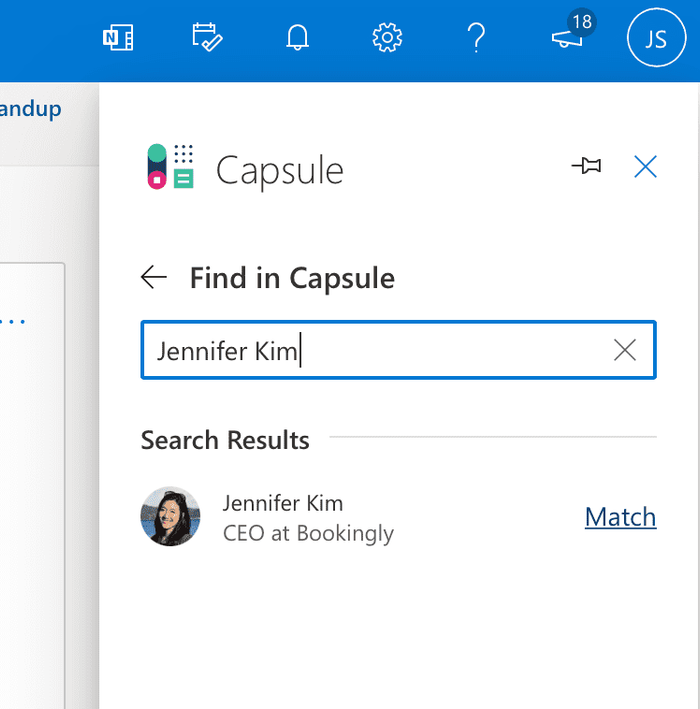
- Find in Capsule will let you search for the contact in Capsule. This page is useful for when a contact you know has emailed you from a new email address that is different from the email address on their existing contact in Capsule. Using the Search by name field you can find the contact you know by name and make a match. Matching a contact will store the new email address on this contact and show their existing contact details.
How to store emails with the Outlook Add-in
When viewing the list of contacts you have the ability to store a conversation, and that way any replies you send or messages back from your contact will automatically be stored in Capsule.
- Click on the contact in the conversation that you’d like to store the email on.
- Use the option to Store on [Contact Name].
- When an email is stored you’ll see a note next to the mail icon to indicate that it has been stored successfully.
At this point, any new emails in that same thread - both sent and received - will be added to the history for that contact in Capsule.
Automatically store emails using the Outlook Add-in
For users on the Growth, Advanced, and Ultimate plans you have an additional option in the Add-in to automatically store emails for a contact. When enabled, all emails to & from that contact will be stored without any more actions by a user.
The option is enabled on a per-contact basis. Here's how to use it:
- When you first receive an email from a contact and you've stored the contact in Capsule, the Add-in will display an option for you to auto-store emails for it.
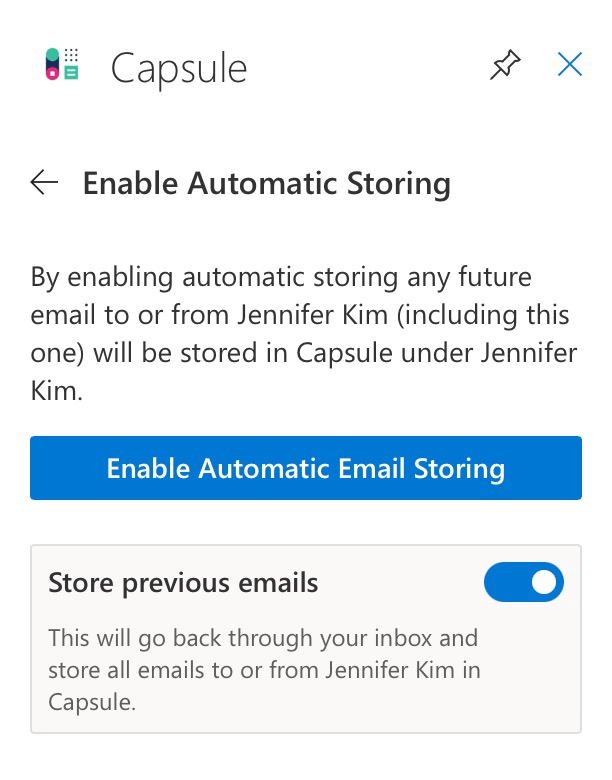
- Click the link to Enable.
- Next you can either just use the button to enable the option or you can first turn on the toggle to also Store previous emails before enabling the option.
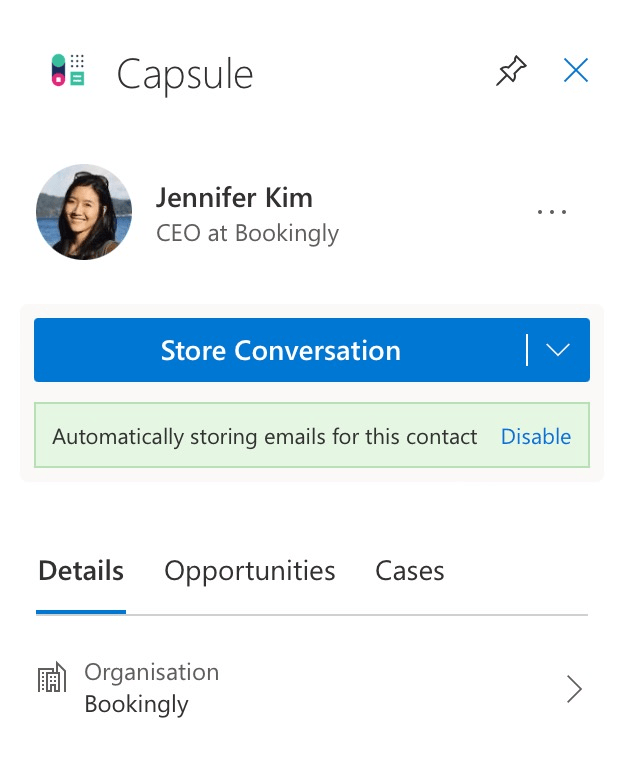
Once enabled, all future messages to & from that contact will be stored in your Capsule account and if you enabled the option to store previous email conversations with the contact. Capsule will go through all previous emails for this contact in Outlook and store them in your account as well.
The auto-store feature can only ever store emails on a contact record however if needed you can always use the Add-in to move a conversation from the contact to a relevant Project or Opportunity should you need to.
How to stop the Outlook Add-in from storing emails
If a conversation stops being useful for what you’re doing in Capsule then you can use the add-on to stop more emails in the thread from being stored. To do that:
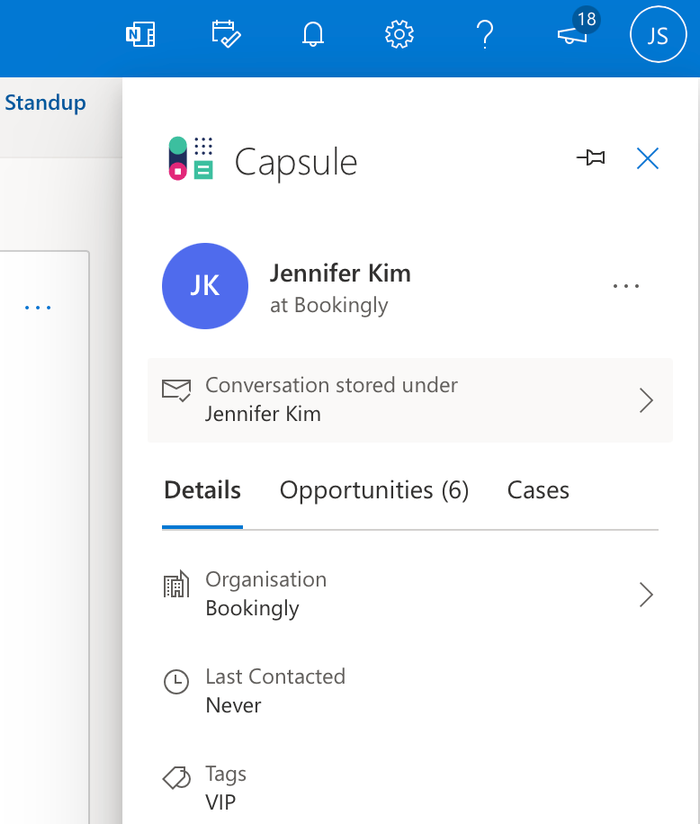
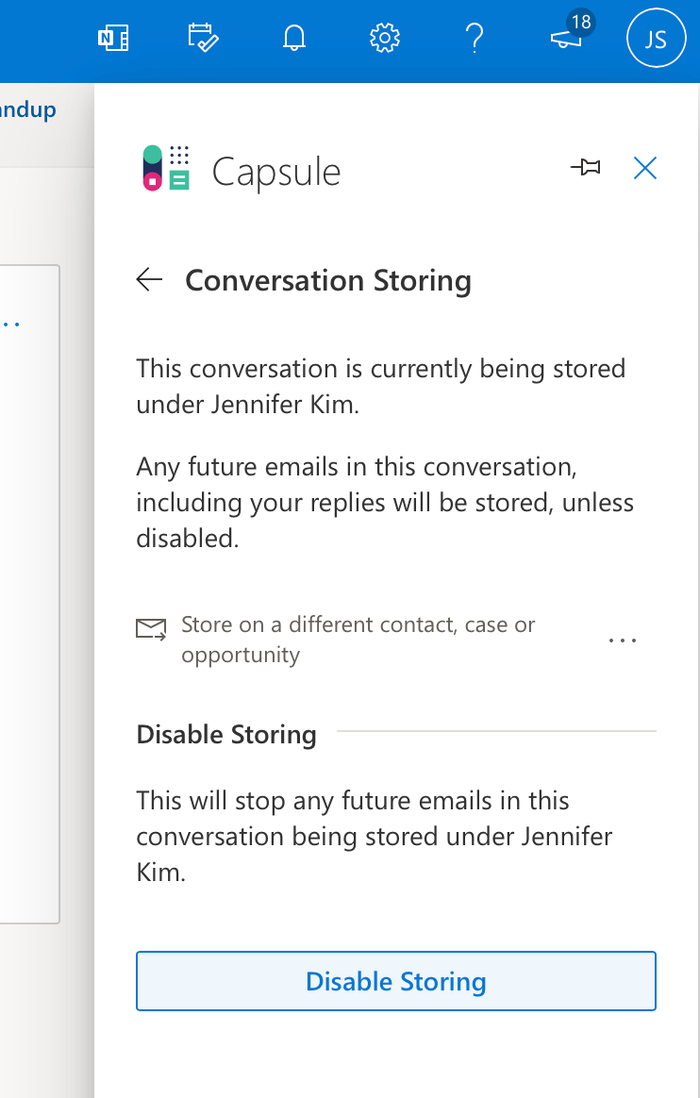
- Click the row that displays the store status. In our example the conversation is stored under Jennifer Kim.
- Click the option to Disable Storing. This will prevent any future emails within this conversation from being stored on this contact in Capsule. You can easily enable storing again by choosing to store this conversation again on the contact page.
How to add Projects, Opportunities and Tasks with the Outlook Add-in
Often times an email can serve as a trigger for you to setup a new opportunity or add a new Project. Instead of having to leave Outlook and go into Capsule you can set that up without ever leaving the email message. When viewing the contact in the add-on:
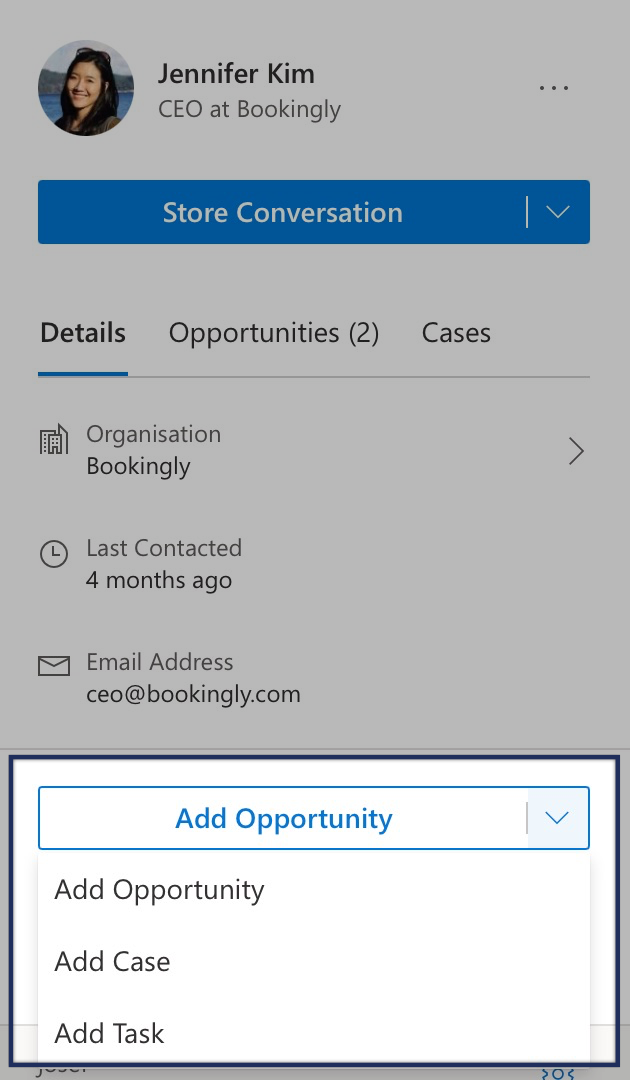
- Click Add Opportunity to begin adding an opportunity for the contact
- Fill in the opportunity details
- Click Save to add the Opportunity to the contact
Known issues with the Outlook Add-in
The Outlook Add-in is not being displayed
If you’re not seeing the Capsule Add-in, it could be that it hasn't been pinned and you have to keep reopening it every time you view an email. To stop that happening you can open an email message > click on the ... More Actions menu and then selection Capsule from the list of Add-ins. Once selected, click the push-pin icon to "pin" the Add-in to the side so it's always open when you view an email.
Option to store conversations is greyed out
While any Outlook user can install the Capsule Add-in for Outlook, the ability to store emails using the Add-in is only available to Outlook users whose email is hosted with Microsoft 365.
If your email isn't hosted with Microsoft 365 then the option to store emails is greyed out.