What does Transpond do?
Transpond provides a seamless way of syncing your Capsule contacts, custom fields, tags and saved lists. Once your Capsule contacts are synced with Transpond you can design beautiful responsive marketing content with a simple drag and drop editor, send and monitor your campaigns and create powerful marketing automations that can automatically email leads and contacts with ease.
With Transpond connected to Capsule, updates to your contacts made in either platform will be shared. You’ll also see a marketing summary for each contact in Capsule as well as being able to filter your contacts in Capsule based upon their status within Transpond.
How to set up Transpond
Whether you are a new or existing Transpond customer, setting up the integration is quick and simple.
- In Capsule, go to Account SettingsIntegrationsTranspond at the top of the page.
- You will now be able to sign up for a new Transpond account or link your existing account to Capsule. Enter your details to connect the accounts.
- You'll be asked to create a Group for your Capsule contacts. This is the Group your Capsule contacts will sync to, any new contacts added to Capsule will also be added to this Group.
Once you have created your Group the integration will begin syncing your Capsule contacts, tags, custom fields and your saved contact lists. During the initial sync, any duplicate or invalid email addresses will be flagged in the syncing report where you can click through to the Capsule contact and merge the duplicate or fix the email address.
Using Transpond
With the integration set up each time you add a new contact to Capsule it will be synced to the Group within Transpond. Similarly, any updates you make to your contact's details, tags and custom fields will also be synced across to Transpond.
Transpond Status
The Transpond Status allows you to control which contacts within Transpond you are able to send emails to and which contacts are included in your monthly/annual pricing plan.
- Active: an Active contact is one who will receive emails you send when included as part of the Group or Segment you send to. The number of Active contacts you have in Transpond determines your monthly or annual charges.
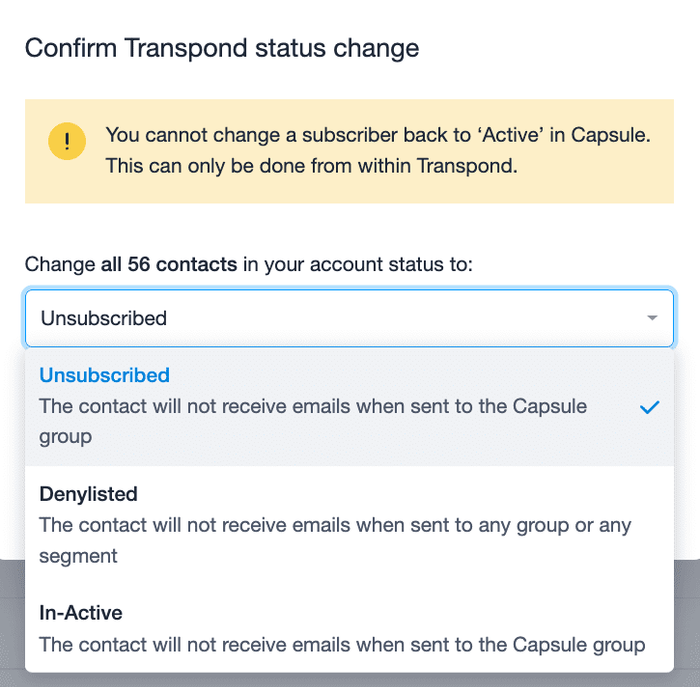
- Inactive: an Inactive contact is one that you have in your Capsule account that you wish to exclude from your Campaigns. In-Active contacts are not billable.
- Unsubscribed: an Unsubscribed contact is one who has requested they be removed from a Group, typically by clicking the 'Unsubscribe link' in the Campaigns you send. Unsubscribed contacts are not billable.
- Denylisted: contacts will be put on the DenyList if they request to never receive an email from you again via the 'Unsubscribe link' in the Campaigns you send. Or if they report your Campaign as SPAM. Contacts on the DenyList are not billable.
- Bounced: a Bounced contact is one who has an invalid email address or one who has received three soft bounces in a row (a soft bounce can occur when there is a temporary issue with a contact's mailbox, such as the mailbox being full or the contact's server being temporarily down). Bounced contacts are not billable.
How to view and change a contact's Transpond status
If you have contacts in your Capsule account that you do not wish to email via Transpond, you can ensure these contacts are excluded from Campaigns and your monthly/annual charges by updating the Transpond Status for these contacts to Inactive, Unsubscribed or Denylisted.
You can change the Transpond Status for a single contact or a list of contacts in Capsule.
How to update the Transpond Status for a single contact
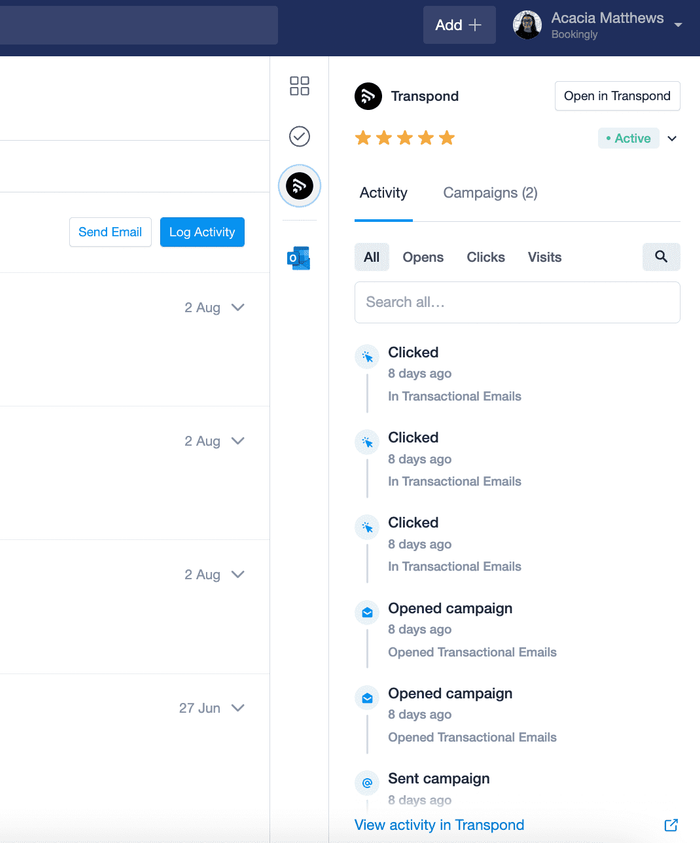
You can view and change the Transpond status of your contacts from within Capsule via the Transpond sidebar for a contact - changes to the Transpond Status will automatically update the status in Transpond.
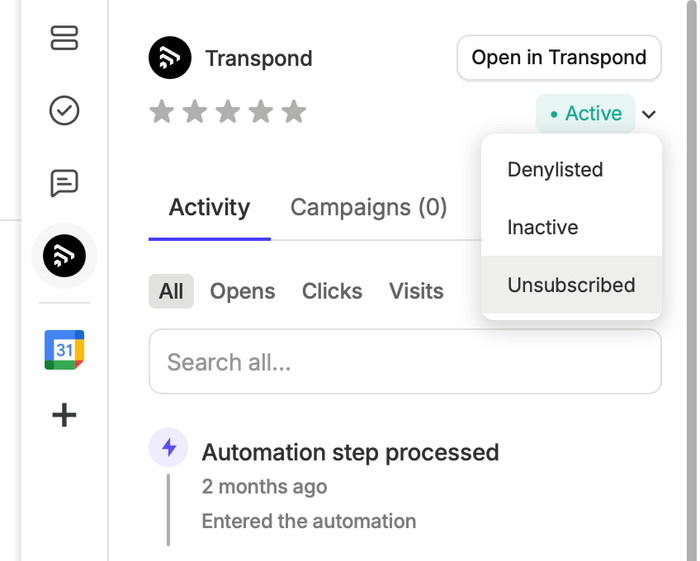
Alternatively, you can click to edit the contact and update the status from within the edit screen.
How to update the Transpond Status for a list of Contacts
The Transpond status of your contacts can also be changed in bulk from within Capsule. The default status for all contacts is Active.
1. In Capsule, go to the People and Organisations tab.
2. Filter for or use the checkboxes to select the contacts you’d like to change the Transpond status for.
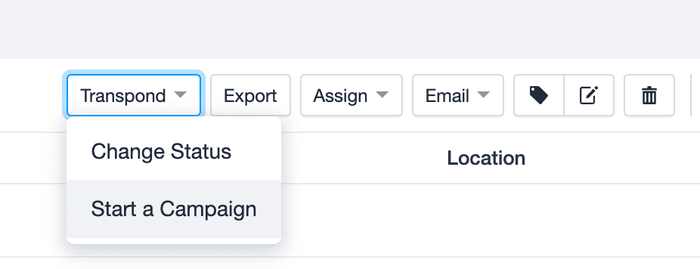
3. From the filter menu, choose TranspondChange Status
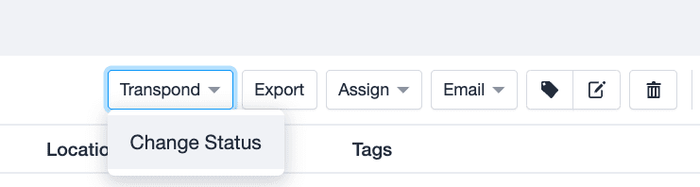
4. Select the new status for your contacts and choose Confirm to save your changes.
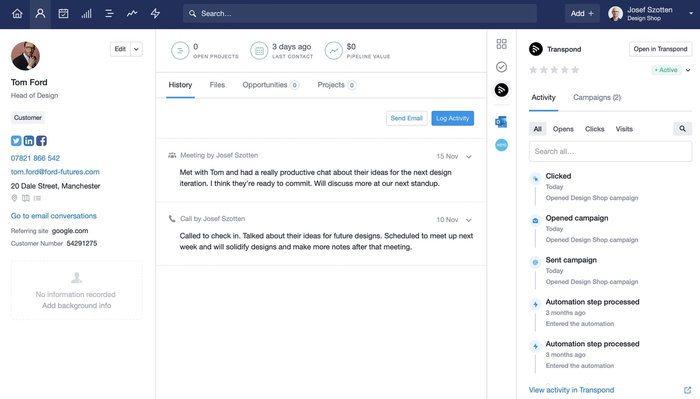
The Transpond Sidebar
Sitting alongside your contact data in Capsule is the Transpond Sidebar. The sidebar provides a summary of your contacts' recent interactions with your marketing content giving your team greater insight into how engaged a contact is with your communications.
Capsule Saved Lists
Your saved contact lists in Capsule are synced to Transpond as read-only Segments, ready for you to send your marketing content to the groups of contacts you've already set up in Capsule. Just like Capsule saved lists, Transpond Segments are dynamic, meaning each time there's a new contact that meets the criteria of the filters they will automatically be included in the Segment.
How to start a Transpond campaign in Capsule
Starting a campaign in Transpond from inside Capsule can be done in a few simple steps. It’s good to know that doing this will start a standard email campaign. For an A/B campaign, you can do this directly in Transpond.
1. On the People and Organisations tab, filter for the contacts you’d like to send the Campaign to or select a Saved List.
2. Choose TranspondStart a Campaign
3. Give your campaign a memorable name and select Create Campaign.
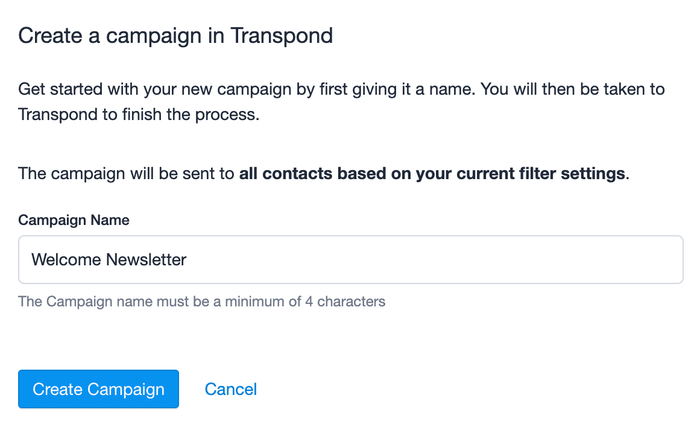
At this point, you’ll be directed to Transpond to continue designing your campaign. If you’re not familiar with campaigns in Transpond, find out more about them in this support article.
Lead Capture with Transpond
Transpond makes lead capture simple and easy. Turn your website traffic into qualified leads by adding a website form to your site and have contacts added directly to Capsule.
Using a Transpond form to add leads to Capsule
- In your Transpond account click on the Websites menu at the top of the screen > Forms.
- Click + Create Form.
- Select the Transpond Group that is linked to your Capsule account
- Select the type of form, either a Regular Form or a Gated Content Form
- Choose if the form should be ‘Hosted’ or Embedded’ (Hosted forms will have a unique URL that you can add to your website or use in marketing communications. Embedded forms will generate a piece of code that you need to add to your site).
- You can now design your form, mapping the field in the form to the fields in your Capsule account.
7. Once the form has been designed, you will need to define what happens when a form submission is made. Best practice is to use a double opt-in approach, Transpond handles this by sending an email to the subscriber asking them to confirm by clicking on a link. Once contacts have verified their email address, they will be added to Capsule.
Tips for using a Transpond form with Capsule
- You can automatically tag contacts added to Capsule from your Transpond form. To do this, when designing the form, click ‘Form Options’ at the top of the screen and under Tags select an existing Capsule tag.
- If your Capsule account is on the Growth, Advanced or Ultimate plan, you can control which user or team the new contacts are assigned to. To do this, when designing the form, click ‘Form Options’ at the top of the screen and, under ‘Capsule assigned user or team’, select the appropriate user/team.
- The character limit for text fields in Capsule is 250. If you need to capture a lot of information in your form, rather than using a text box field, you should use a ‘Capsule Note’ field. When a contact adds information to this field, it will be added as a note to the contact in Capsule.
GIF to show how to add a Capsule note field to a website form to capture to capture information
Capsule & Transpond Automations
Transpond Automations provide powerful functionality that make sending the right message at the right time simple. You can set up Automations that will apply to all Capsule contacts, campaign specific Automations or you can set triggers for actions within Capsule, such as sending an email when an Opportunity is won, or when a Project is closed.
Automatically send updates to Capsule
To set up an Automation that sends updates back to Capsule; in Transpond, go to Account Menu > Integrations > click Manage next to Capsule > click Configure next to Campaign and Automation History
Here you can choose which types of campaign action triggers an update in Capsule. You can also choose how the contact in Capsule is updated. For example, you may wish to add a note to a contact if they unsubscribe from your mailing list.
Campaign specific Automations
When creating a campaign in Transpond, after you have chosen the recipients, finialized the template for the email - the next step allows you to set integration actions specifically for the campaign you are working on. Here you can choose which types of campaign action triggers an update in Capsule. You can also choose how the contact in Capsule is updated. For example, you may wish to add a note in Capsule when a contact clicks on a link so your sales team can follow up with a call to discuss a particular product or service.
Capsule triggered Automations
A powerful feature of the Transpond Automations is the ability to use actions in your Capsule account as triggers to send specific campaigns, email notifications or updates to your Capsule account. A good example of this might be notifying your accounts department once an opportunity has been won so they can draw up an invoice.
To set up Capsule triggered Automations; in Transpond go to Atomations > + Create Automation > click to define the Workflow Trigger and select When something happens in Capsule. You can now select which action you would like to trigger.
With the Capsule trigger defined you can now make use of any of the available Automation steps in Transpond which include; sending a campaign, sending an email notification, updating a contact in Capsule and even sending information to the other apps your Transpond account is connected to.
How to disable Transpond
To disable Transpond:
- Go to Account SettingsIntegrationsTranspond and click the button to Configure Transpond.
- Click to disable Transpond and confirm.
Disabling Transpond will not remove any contact data from Transpond.