How to streamline Projects using Tasks and Tracks
Depending on what you need to get done, you can add standalone Tasks or use a predefined set of tasks in a Track for more standardized workflows.
Manage your To-Do's for projects or events such as sending an invoice or ordering materials using Tasks. Tasks can also be repeating, so if this is something you do on a monthly basis you can set up your task to repeat every month.
Tasks can be added on the fly by clicking the Add Task button on the right hand side of a Project.
Tracks are a predefined set of tasks unique to your business. They can quickly be applied to a Project and allow you to see all of the relevant tasks to be completed to meet your deadlines.
You can apply an existing Track to a Project:
- By selecting it from the Track drop down box when first creating a Project.
- When viewing a Project record you’ll see the option to Add Track.
When adding a Track to a Project you may be asked to select an end date for when you would like the list of tasks to be completed. Tasks within this Track will be given due dates based on the date selected to meet your goals.
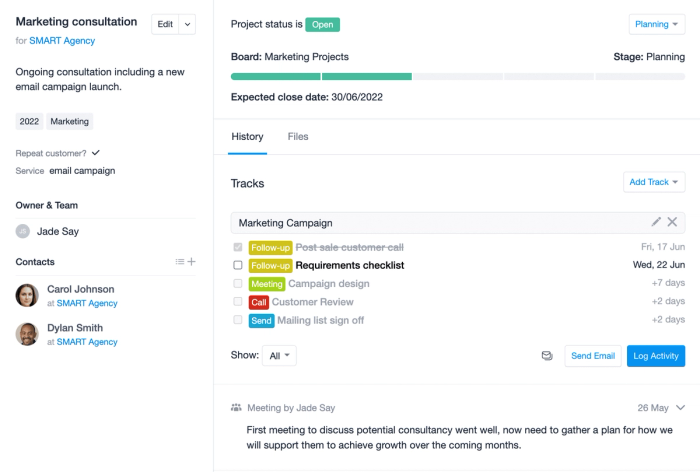
Inactive Tasks on a Project
When closing a Project, any open Tasks and Tracks will become inactive. They will be removed from your upcoming Task List and Calendar. If you reopen the Project then the tasks will become active again.
If a Task or Track is added to a Project after it has been closed, the tasks will be applied and will be active.
How to store emails on Projects
Centralize all communications for a project or event using the Mail Drop Box. The Mail Drop Box allows you to easily store emails on existing Projects or even create brand new ones.
If you’d like to attach an email to a Project that already exists you will just need to BCC it’s unique Mail Drop Box address when sending/forwarding emails.
You can find the unique drop box address in the main body of the Project if it doesn't yet have any notes or emails recorded on it.
If the Project already has activity recorded on it you can find the Mail Drop Box address by clicking the Actions menuAttach an Email
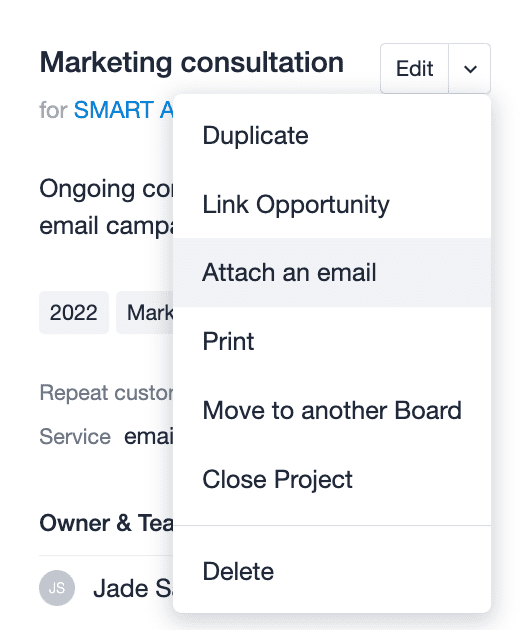
How to Log your Activity on Projects
Projects allow you to keep all of your meeting and call notes in one place, painting a picture of the whole project or event from a glance. Ideal for recalling the outcome of your own meetings and for keeping your colleagues aligned when multiple people are collaborating on a project.
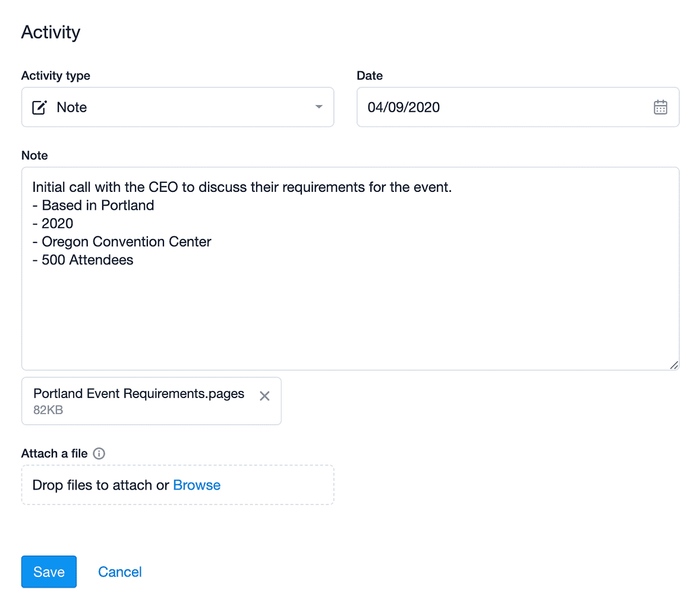
You can start logging your notes and calls on a Project using the Log Activity button. Here you will select the type of activity carried out and leave any relevant comments. Logged activity is time stamped too, providing a clear timeline of actions carried out.
If you have files to compliment your notes and calls these can be stored in Capsule whilst logging activity by dragging them into the file area or using the Browse button. Read more on that here.
How to Email list of Contacts linked to a Project
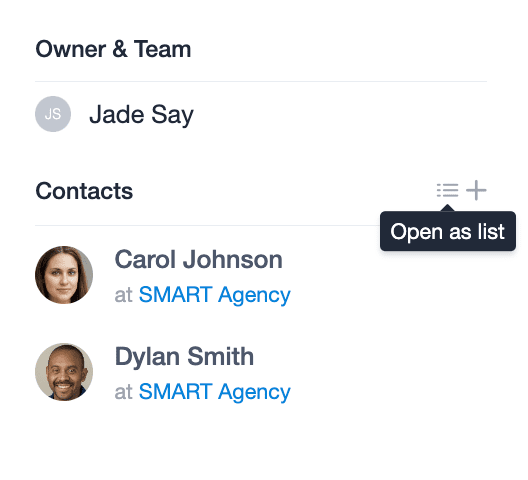
If you have a number of contacts linked to one Project, you might like to carry out bulk activities for these contacts. For example, if you’re using a Project for a marketing campaign you could send all contacts that have shown interest and are linked to the Project, an email. Or perhaps you would like to tag all of the contacts who are linked to the Project in order to categorize them.
For any bulk action, you will first need to view the contacts in a list. To do that click Open as List. Once presented in a list you can then use the options on the right to either export the contacts, send an email, add a note or apply a tag.

How to Attach Files to Projects
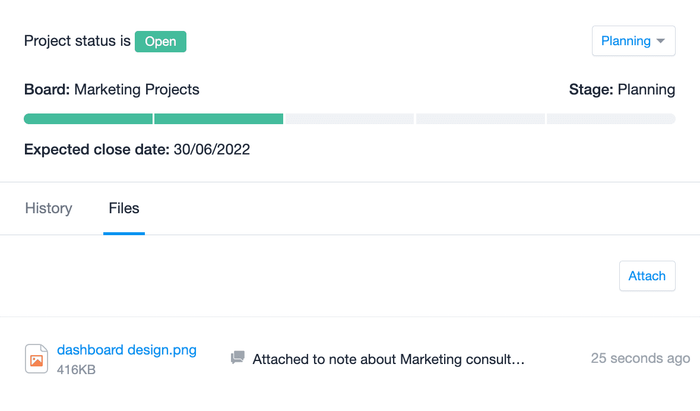
As Projects have been designed as an area for managing work, it is likely you’re going to be attaching files to them. You can attach files to a Project by:
- Opening the Project record and clicking on the Files tab > Attach.
- Either drag the file into the file area or click the Browse button to select a file when logging a new or editing an existing activity on the Project.
These attachments can then be found listed in the Files tab.
Linking Projects to Opportunities
Winning a sales deal can often be the very start of a project. Using Projects allows you to manage the next stage in the process. You can link a Project with an Opportunity in order to bridge the gap between pre and post-sale activities.
To do that:
- Click the Actions menu next to the Project name
- Select Link Opportunity
- In the search field enter the name of the Opportunity or the primary contact for an Opportunity
- Once selected click to Link.
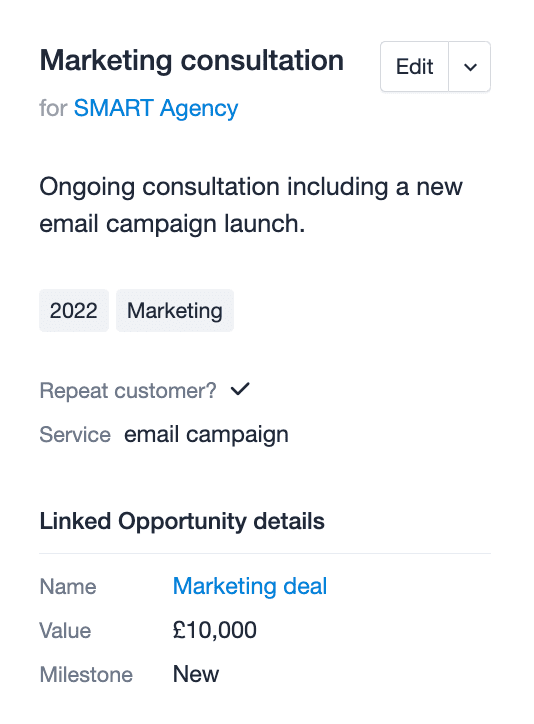
Now when viewing the Project, details of the linked Opportunity can be found on the left hand side. Giving your team a complete overview of the project they are working on.
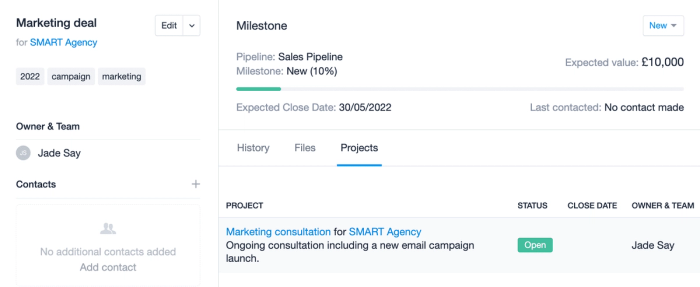
It’s possible to link multiple Projects with one Opportunity. When looking at an Opportunity all linked Projects will be listed under the Projects tab.
Filtering Projects
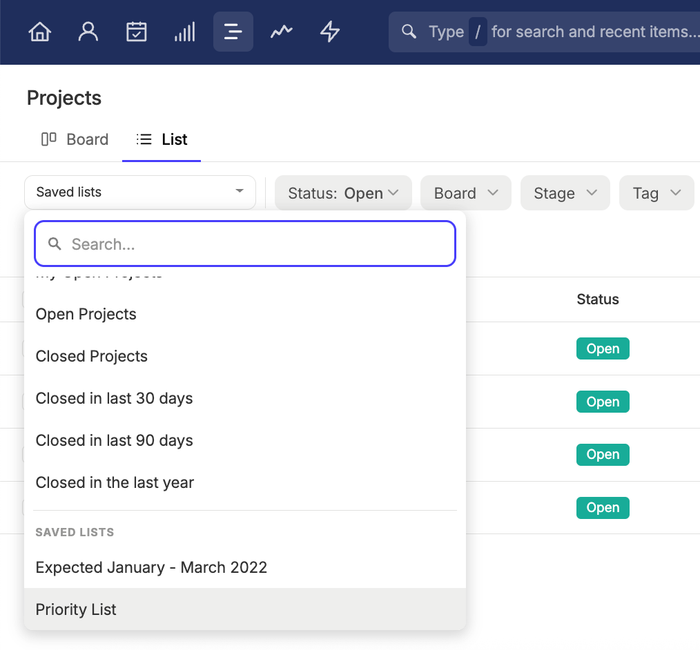
The Project list view allows you to filter for only the information that you need. As standard, Capsule has a number of Project lists you can use. They can be found in Projects > Saved Lists.
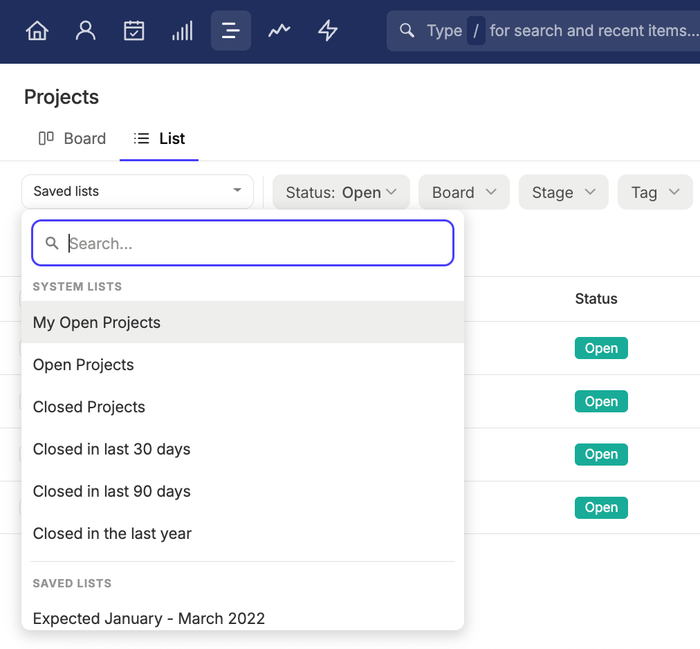
You decide how you would like to use this list. For example, you may want to export the list or tag all Projects in the list.
As well as the standard lists, you may wish to create your own custom lists. For example, filtering for all Projects that have a certain tag applied.
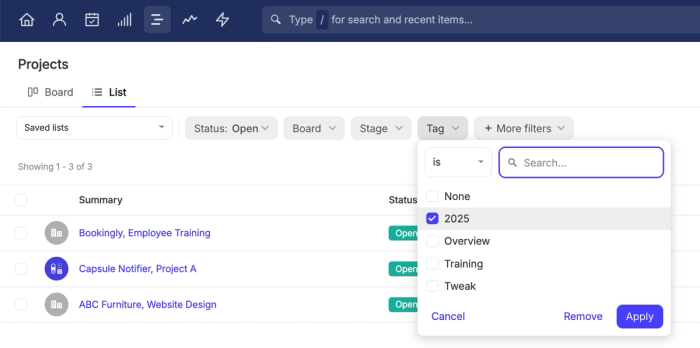
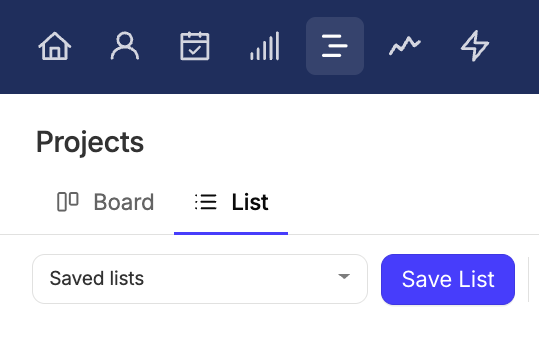
You can save Custom Lists by selecting Save List button. You can decide whether this list will only be available for yourself or all Capsule users.
This list becomes available in the dropdown of Saved Lists.
Exporting Projects
When exporting a list of Projects, you can choose to export it as a CSV or Excel file. Please note, this is available for Users who have the Allowed to export records to CSV or Excel permission checked in their Profiles.
To export a list of Projects:
- Navigate to Projects
- Choose an existing list or create a new list using your own filters
- Select the Export button on the upper right-hand side of the list
- On the lightbox that appears, select your column template and file type:
- CSV- CSV files are useful if you’re looking to use the file to do a mail merge or if you’re importing it into another tool.
- Excel - Excel files are better suited if you’re only looking to view, edit or share the file with other people.
- Finally, select Export