Typeform is a tool that specialises in form building. With the help of Zapier, you can make sure that any new entries in Typeform are also created in Capsule, saving you the task of any manual work.
Getting Started: What You'll Need
To build the automation in this article, you will need:
- A Typeform account: An active subscription to Typeform
- A Capsule CRM account: An active Capsule CRM account
- A Zapier account: A Zapier account allowing multiple steps
How to set up the Typeform to Capsule Zap
Zapier works with Triggers and Actions - this means you can set up a Trigger in Typeform and then an Action in Capsule based on this.
This Zap adds a brand new Contact to Capsule once a Typeform has been submitted. Click on the below Zapier template link to load the Typeform Template
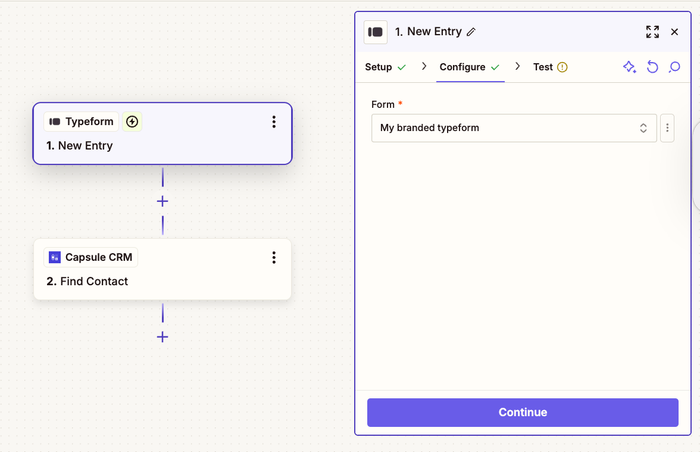
Define the Zap Trigger: New Entry
1. You should be directed to this step in the template - but if not, click on the tile for New Entry
2. In the Account field on the same page, choose Sign In to link Zapier to Typeform - or select an already existing Typeform connection
3. When directed back to Zapier, choose Continue
4. On the Configure tab, select the relevant Form. Use the dropdown option if you have multiple and then press Continue when you’re happy with the choice
5. At this point, you will be asked to Test your Trigger. Use the Test Trigger button to complete the check - here you will be able to see an example of the information from your completed Typeforms.
You’ll need to ensure that you have at least one historical submission in place within your Typeform account. If not, please go back and add some dummy submissions for the purpose of creating this Zap.
6. Select one of the examples, then choose Continue with selected record to take you to the action
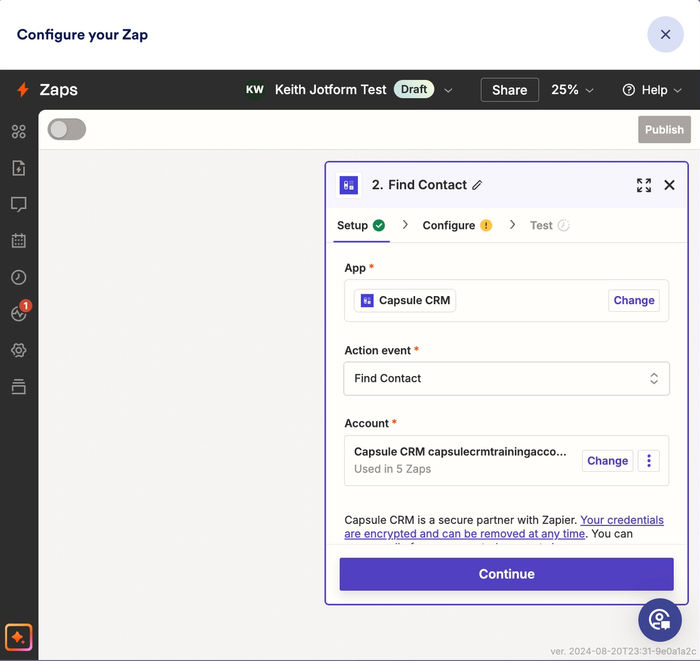
Define the Zap Action: Find Contact
1. Now we can find or create the Contact in Capsule. You should be redirected to this step in the template - but if not, click on the tile for Find Contact
2. In the Account field, choose your Capsule account. If you’ve set up a Zap for Capsule earlier, you’ll be shown an existing account. Or follow the instructions to link your account and click Continue
3. On the Configure tab, select the + icon in the Value field, then select the Email Address field from Typeform. In this example, we have used Email:
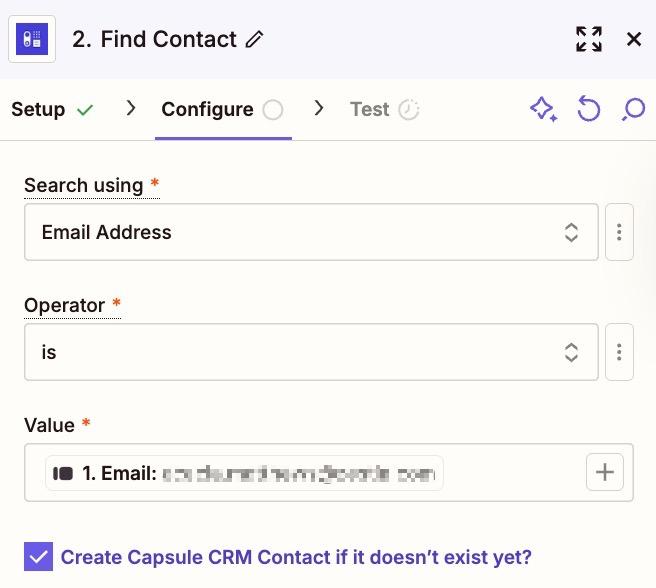
4. Make sure the Create Capsule CRM Contact if it doesn’t exist yet? box is checked.
The configure stage is important because here you’re mapping the relevant fields from your Form to the correct Fields within Capsule. You’ll also see below an example of how the mapping should look:
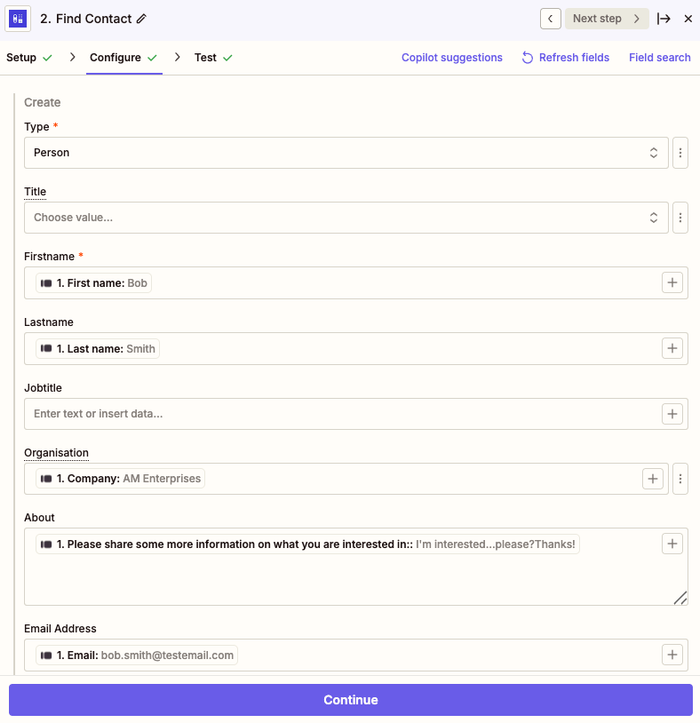
5. It’s important to note that any Custom Fields will need to be set up in Capsule prior to integrating Typeform. Once you’re happy with the configuration, click on the Continue button, and you’ll then be able to run a test.
We always recommend that you test the integration before making the Zap live, as this will help ensure that everything is working properly. Below you’ll see an example of a new submission which has been created:
6. Once the test is successful, click the Publish button to save your changes and push your Zap live.
This activates the integration, and from this point onward, any new entry from Typeform will automatically create a Contact (if they don’t already exist) in Capsule.