Slack is a messaging app for businesses that connects people to the information that they need. With the help of Zapier you can create Slack channel notifications when an Opportunity changes milestones in Capsule.
Prerequisites
- A Capsule account
- A Zapier account on a plan that allows multi-step Zaps
- A Slack account
How to set up the Capsule to Slack Zap
Setting up this Zap is a simple way to keep up to date - making sure each time an Opportunity reaches a specific Milestone in Capsule, this then sends a message to your chosen Slack channel.
We have created a template to make the process as simple as possible
Click the link above to get started, then follow the steps below:
Define the Zap Trigger: Opportunity Moved
1. You should be directed to this step in the template - but if not, click on the tile for New or Updated Opportunity
2. In the Account field, choose your Capsule account. If you’ve set up a Zap for Capsule earlier you’ll be shown an existing account. Or follow the instructions to link your account and click Continue
3. On the Configure tab, click Continue
4. At this point, you will be asked to Test your Trigger. Use the Test Trigger button to complete the check - here you will be able to see an examples of recently updated Opportunities in Capsule
5. Select one of the examples, then choose Continue with selected record to take you to the next step
Add a filter for a specific milestone name
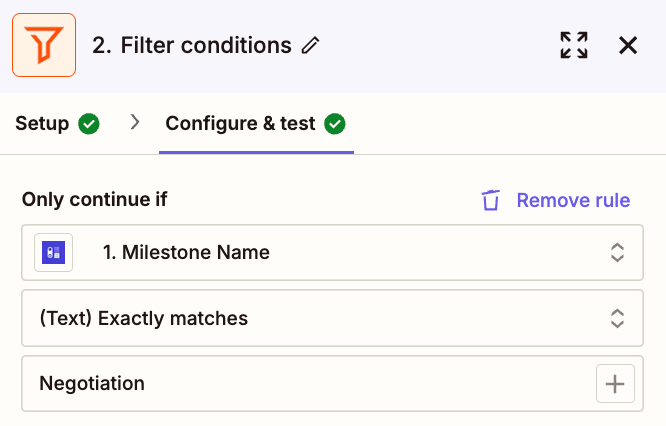
1. Next, we need to filter for a specific milestone in Capsule - for it to pass through to the next step. You should be redirected to this step in the template - but if not, click on the tile for Filter conditions
2. Click Continue
3. On the Configure & test tab, enter the Milestone name in the last field. In this example, we’ll use the Negotiation milestone of our Sales Pipeline

4. Then Click Continue.
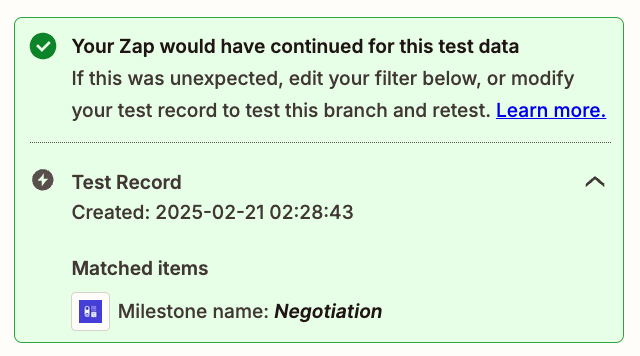
This will test your filter with your existing test record and let you know whether or not the zap would have continued. As this Zap uses an extra filter, it’s possible your original test Opportunity will not meet this criteria you will see a message that the Zap would not have run. If this happens, go back to the Test step of the Trigger and choose a different test Opportunity. If you don’t have any suitable options, simply go into Capsule and move an Opportunity to the milestone to test and refresh the Test step.
If successful, after testing, you will see a green box to confirm

5. Be sure to test with different examples to confirm you have the filter set correctly. When you are ready, click Continue
Define the Zap Action: Send Slack Message
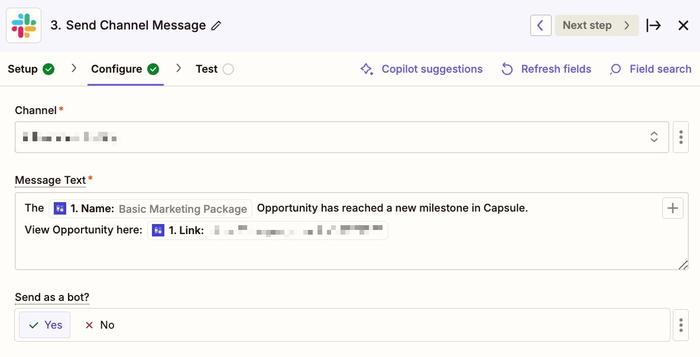
1. Lastly, we can configure the message. You should be redirected to this step in the template - but if not, click on the tile for Send Channel Message
2. In the Account field, choose your Teams account. If you’ve set up a Zap for Teams earlier you’ll be shown an existing account. Or follow the instructions to link your account and click Continue
3. On the Configure tab, select your Slack account (if you haven't yet connected Slack to Zapier you can do so here).
Set up the action and click Continue. When composing the message you can pull in Opportunity-specific information such as:
- Opportunity name
- The link to the Opportunity in Capsule
- The Opportunity value
- And the other options as you like

4. Now you will be asked to test the action. Click Test step to send a message to your Slack account:

4. If the test is successful, you're ready to Publish your Zap.