Integrating Shopify with Capsule through Zapier allows you to trigger different workflows, for example, you’ll be able to create new Contact records in the CRM instantly and you’re also able to add new activity from Shopify orders to existing records within the CRM. This is a great way to save time, reduce the need for manual entry & centralise all of your key information.
There are Zapier templates available for Capsule already which make the setup process very simple. Let’s look at how to set up the integration, we’ll start by looking at how to add a new Contact record to Capsule from a new Shopify customer:
Prerequisites
- A Capsule account
- A Zapier account on a plan that allows multi-step Zaps
- A Shopify account on one of the following plans: Basic, Shopify or Advanced
How to set up the Shopify to Capsule Zap
Zapier works with Triggers and Actions - this means you can set up a Trigger in Shopify and then an Action in Capsule based on this. We have created two helpful Zap templates, click on the one you want to set up below:
- Anytime a new customer is created in Shopify, find or create the Contact in Capsule CRM
- Anytime a new order is created in Shopify, find or create the Contact in Capsule CRM and add an activity to the record
Anytime a new customer is created in Shopify, find or create the Contact in Capsule CRM
Below we’ll first outline the necessary steps for Finding or creating a Contact, after selecting the template:
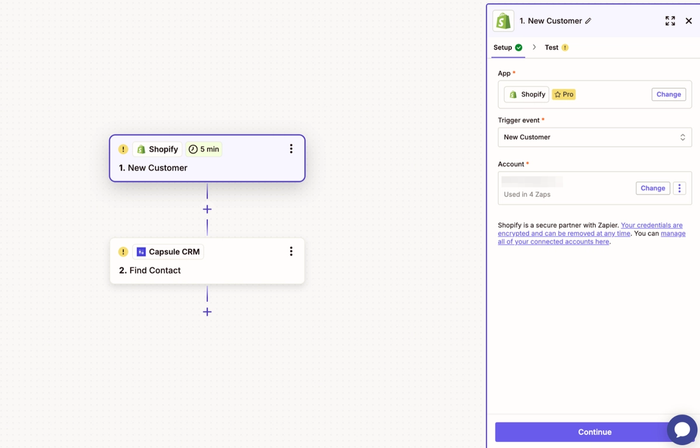
1. You should be directed to this step in the template - but if not, select New Customer as your Trigger event
2. The next step is to connect your Shopify account directly by adding your account ID, which you can find in your Shopify web URL. Once added, you’ll then be taken to Shopify to install the Zapier app. After this has been actioned your setup should look like this:
3. Click Continue and you’ll then be taken to the test screen, where you can ensure the trigger is working properly. Please ensure you have at least one Contact available in Shopify to test the connection, select the relevant record and then click the Continue button. The next step is to connect Capsule CRM as your action
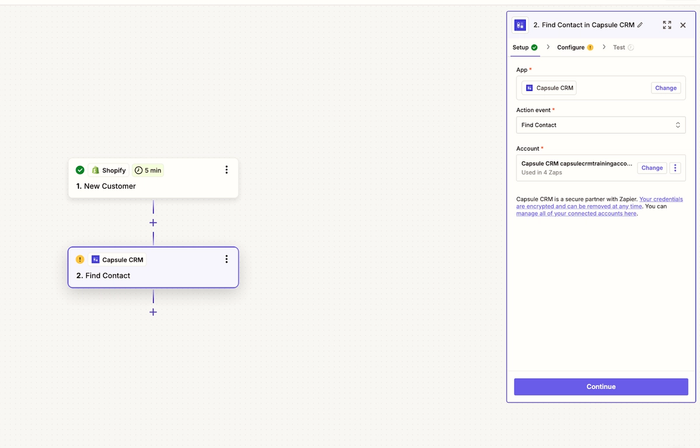
4. For the Action event - Find Contact should already be connected, you’ll then need to select the relevant Capsule account. Once actioned your setup should look like this:
5. Click Continue, you’ll then be taken to the configure screen where a Search using step will already be mapped. There are different ways that you can find Contacts that exist within the CRM already, in this example, the template is going to search using an Email Address:
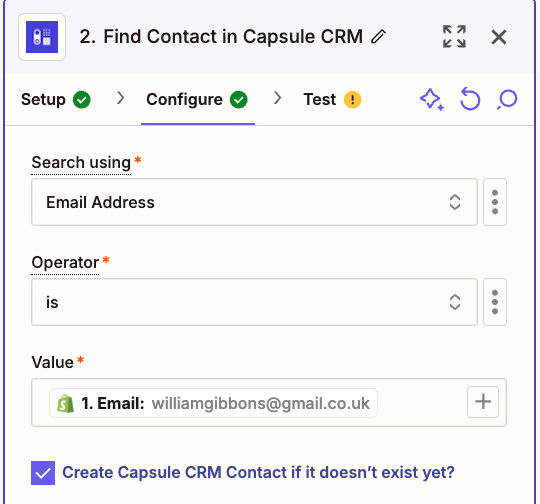
The configure stage is important because here you’re mapping the relevant fields from Shopify to the correct fields within Capsule.
6. The checkbox for Create Capsule CRM Contact if it doesn’t exist yet? will be auto-selected as part of the pre-configured template
7. You’ll also see below an example of how the Contact mapping should already look within the template:
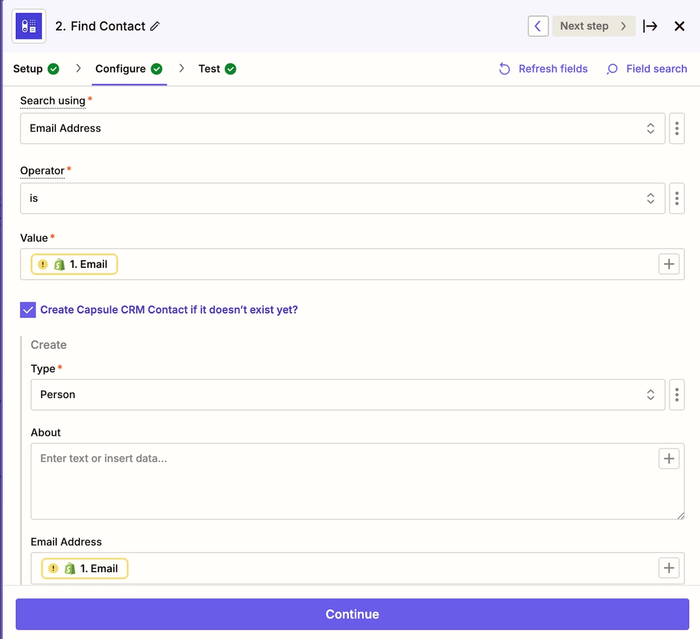
8. It’s also a good idea to ensure that the appropriate Custom Fields are set up in Capsule prior to integrating Shopify, this will allow you to map the information that’s relevant to your Contacts. You’ll be able to add any additional mapping as part of the configuration page.
9. Once you’re happy with the configuration click on the Continue button and you’ll then be able to run a test before publishing the Zap. We always recommend that you test the integration before making the Zap live, this will help ensure that everything is working properly. Below you’ll see an example of a new submission:
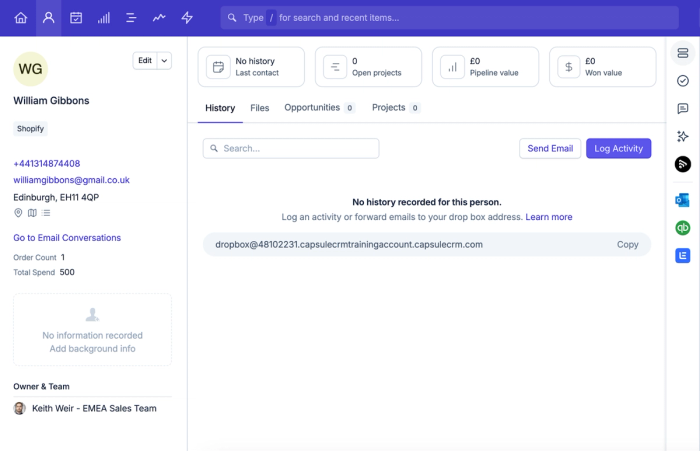
You’ll notice in the above screenshot that we’ve also updated Custom Fields in the CRM which are called Order Count and Total Spend. You can find more information around setting up these types of Fields in Capsule here.
Anytime a new order is created in Shopify, find or create the Contact in Capsule CRM and add an activity to the record
If you’d like to add new history to a Contact record when a new order is created, this is also a straightforward process and it can be particularly useful when you have repeat business made by clients via Shopify.
In order to configure this second example, you’d select New Order as your trigger event and you can also use our pre-configured template:
1. In the initial configuration, select New Order as your Trigger event (again this will be selected with our pre-configured template already) and you’d follow the same process as what we previously covered in steps 3 & 4 in this section.
2. You’d be looking to add a Find Contact step (the same as outlined previously within steps 5 > 7 in this section) to ensure the record is correctly identified first.
For this template, we’re also going to search using an Email address. There will also be some basic mapping pre-configured as part of the template, we’d recommend adding the additional field mapping that will be relevant for your Contacts. Please refer to steps 8 & 9 in this section for more information on setting up Custom Fields.
3. Once you’ve configured the Shopify Trigger and your Capsule search event, you’d then review the action event for Add Note to entity, an example of this can be seen below:
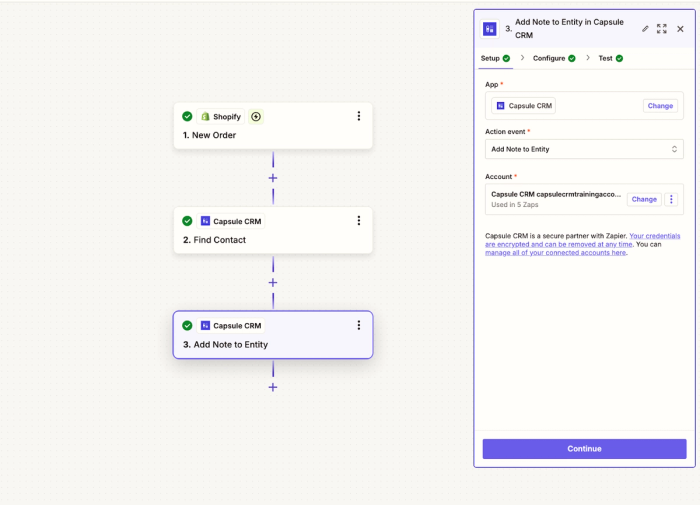
4. Ensure that your Capsule account is connected, select Continue and then complete mapping which would be similar to what’s outlined in the below screenshot:
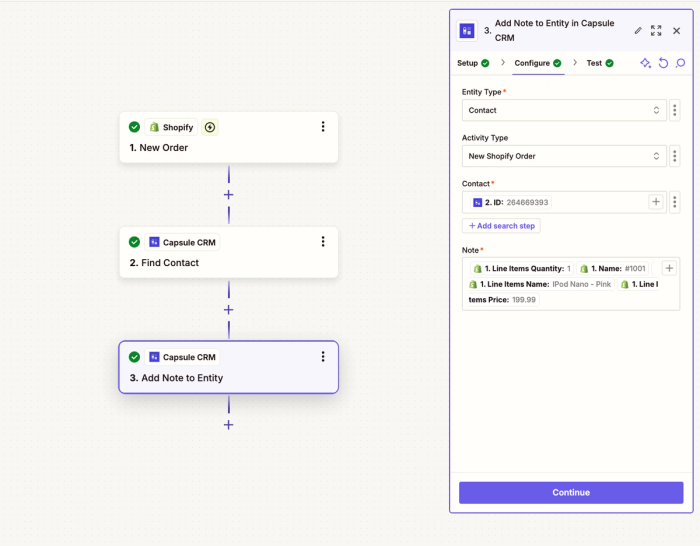
5. In this example we’ve created a custom Activity Type within Capsule, to help ensure that these Shopify orders are clearly logged within the history of a record. Custom Activity Types can be created on the Growth, Advanced and Ultimate plans. If you’re on the Starter or Professional plan, you can select a note as the Activity type.
You can also define the format in which you’d like the information to be pulled into the Capsule activity. In this template, we’ve added some information from Shopify which should be helpful, however, this can be updated based on preference. Once you’re happy with the configure stage, click Continue and then run your final test.
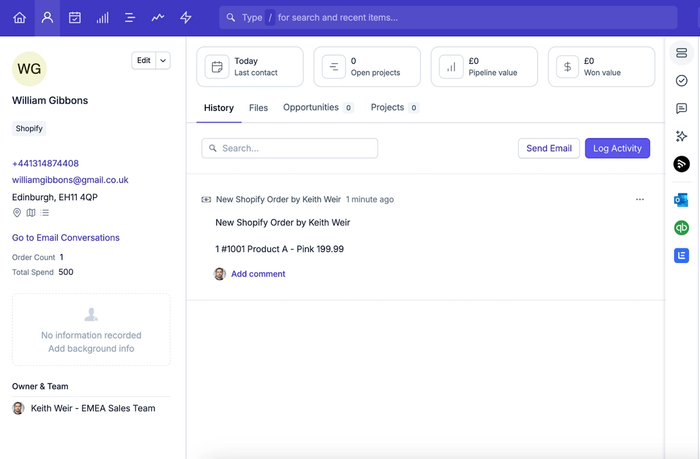
You’ll see below an example screenshot of how this could feed into the activity record of a Contact within the CRM:
There are many triggers available for Shopify and you’ll also be able to handle different actions within Capsule such as creating new Sales Opportunities, Projects & Tasks. The options available will really help when it comes to building the preferred workflow for your business.