Some businesses have multiple different products or services which require very different processes for managing the pipeline. In these situations, you can create multiple sales pipelines to allow you to track each process separately. This gives you much greater control over your sales processes and keeps each one separate for easier management.
How to add more pipelines
By default, every account has one pipeline, simply called “Sales Pipeline”. Admins can add more pipelines by going to Account Settings > Sales Pipelines and clicking the option to Add Pipeline. You can then add the Name for the Pipeline. You can also add a Description here which is only shown in your Account Settings to provide context around the purpose of the Pipeline.
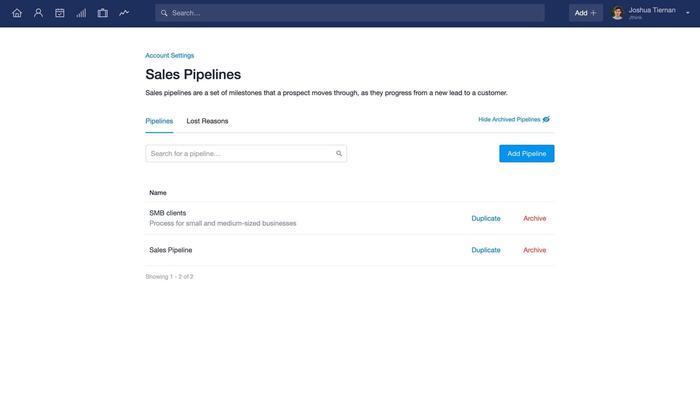
Admins are also able to edit the initial "Sales Pipeline" just like any other Pipeline they create, in case you'd like to rename it or make any amendments to the Milestones.
Pipelines all share the same set of Lost reasons, so there's no need to set up new Lost Reasons for each Pipeline.
Duplicating a pipeline
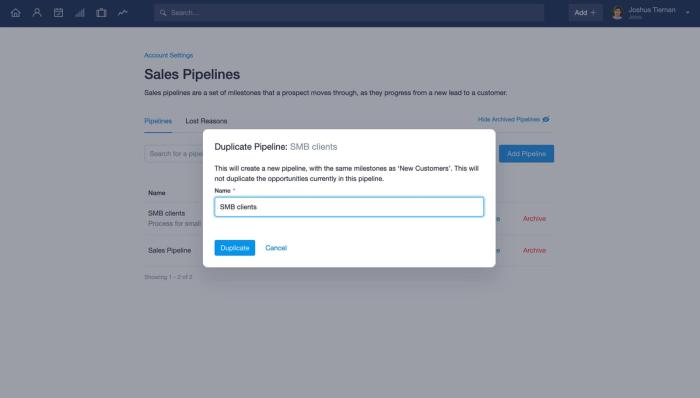
If you already have a Pipeline set up and want to add another with similar Milestones, you can quickly duplicate an existing Pipeline by going to Account Settings > Sales Pipelines and clicking the Duplicate option beside the Pipeline you want to duplicate. This brings up a modal where you can name your new Pipeline and click Duplicate to confirm. This will create another Pipeline with the same Milestones and settings, but won’t copy over any of the Opportunities from the original Pipeline you duplicated.
Managing your pipelines
On the Sales Pipeline tab, you can view your Pipelines in a couple of different ways.
Kanban view
On the kanban view, click the Pipeline filter at the top of the page to switch between your pipelines quickly. This allows you to see the state of each Pipeline visually. You can only view one Pipeline at a time on the kanban view.
filtering multiple pipelines
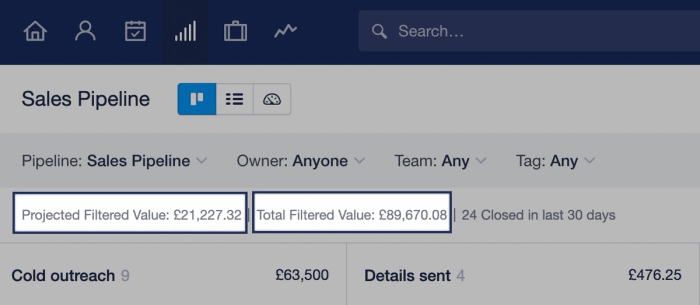
At the top of the Kanban view, you will see the total value of all your Pipelines and the total forecasted value of all Pipelines. You can also see the values of the currently selected Pipeline at the left side of the screen.
List view
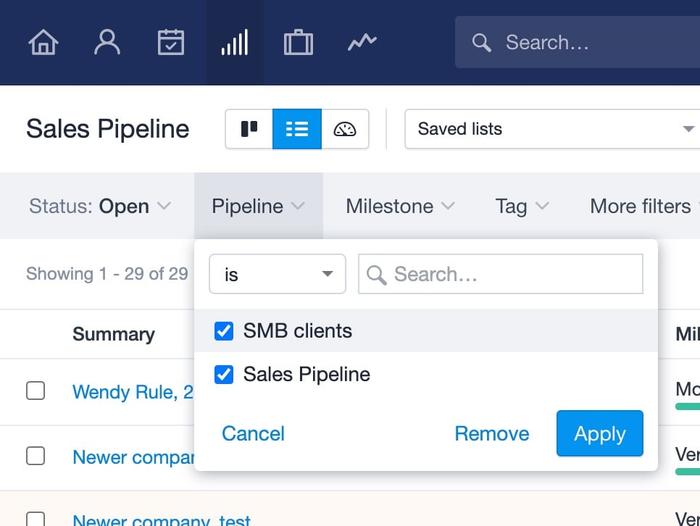
Switch over to the list view and you can view any number of your Pipelines at the same time by using the Pipelines filter at the top of the page and checking the checkboxes of the Pipelines you would like to include. This view allows you to aggregate your Opportunities into a single list to get the context of multiple pipelines simultaneously.
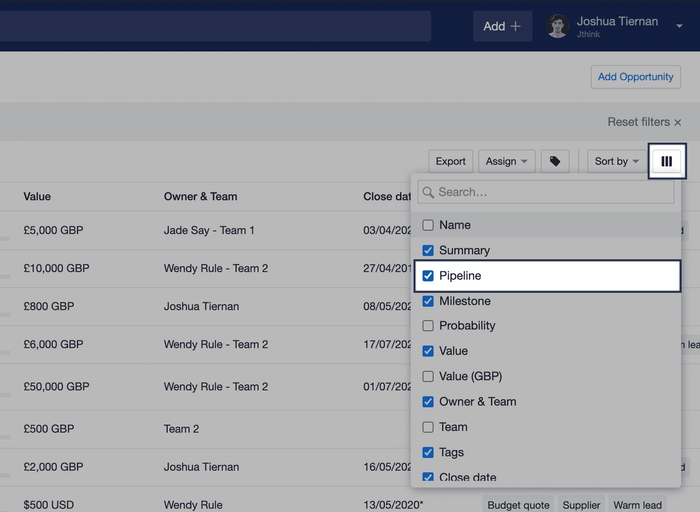
You can also add a Pipeline column to the list to easily see which Pipeline each Opportunity belongs to. To do this, click the column icon at the right side of the page and check the Pipeline checkbox.
Moving Opportunities to a different Pipeline
Depending on your setup, you may find that you need to move Opportunities from one Pipeline to another. There are a few ways you can do this.
When creating or editing an Opportunity, you will see a Pipeline field where you can quickly select which Pipeline the Opportunity should belong to. Once you select a Pipeline, you can then use the Milestone picker to select the relevant Milestone from that Pipeline.

You can also quickly move an Opportunity to another Milestone from the Opportunity record itself. To do that, click the dropdown arrow beside the Edit button and select the pipeline and milestone the opportunity should belong to.
.
It's also possible to move an Opportunity to another Pipeline in the Kanban view. On this screen, you can drag the Opportunity to the bottom of the screen and drop it onto the 'Move Opportunity' section.
.
How to archive pipelines
If you find that a Pipeline is no longer required, an Admin can archive the Pipeline. To do this, go to Account Settings > Sales Pipelines and click Archive next to the Pipeline you want to archive and click Archive again on the popup modal to confirm. This removes the Pipeline from your available Pipelines. This will only work if the Pipeline doesn’t have any active Opportunities. If there are still active Opportunities on the Pipeline, you would need to move them to another pipeline or delete them first and then archive the Pipeline.
You can restore an archived pipeline at any point by clicking Restore next to the pipeline in the Account Settings.
Any Opportunities that are created using the Mail Drop box or by 3rd party integrations will always be added to the oldest active pipeline by default.
Reporting on your pipelines
You can report on each of your Pipelines separately to allow you to easily identify which of your sales processes is delivering the most value. The Pipeline by Value report shows the total number of Opportunities in each Pipeline as well as the total value of each Pipeline. This allows you to quickly see which sales process closes the most sales and also delivers the most value.
As well as this, you can use the Pipeline filter on any other report to show the data for each pipeline separately or all of them together.
You can also view your sales data by pipeline using the Google Data Studio integration.
Adding Opportunities to a specific pipeline via the Drop box
If you use the Mail Drop Box to add Opportunities by adding opportunities@... to the beginning of your drop box address, these newly created Opportunities will always be added to the oldest active (non-archived) Pipeline by default.
You can specify a specific pipeline to attach these to by changing the start of your drop box address to pipeline+ and the name of your pipeline with no spaces to the beginning of your drop box address instead.
For example, let’s say you have a pipeline called “Enterprise clients”, to add an Opportunity directly to this Pipeline, the beginning of your drop box address would look like this pipeline+enterpriseclients@....