The KashFlow integration allows you to keep your customers in sync and gives you an instant overview of what invoices you have for a contact without ever leaving their contact record in Capsule. It also makes it super simple to add new contacts from Capsule to KashFlow when you want to start invoicing them.
What does the KashFlow integration do?
Integrating Capsule with KashFlow will automatically add all your KashFlow contacts into your Capsule account.
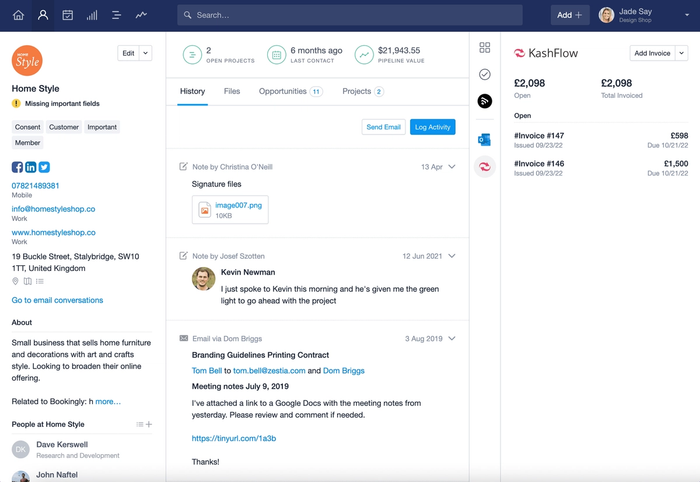
All invoice information in KashFlow is summarized in Capsule including;
- Payment due dates,
- Whether an invoice has been paid
- Overdue amounts on the linked contact record in Capsule.
Once the integration is setup and working, Capsule will keep updating KashFlow with any changes you make to your contact records, so you should always treat Capsule as your source of truth, e.g. if you update an address in Capsule, the corresponding contact in KashFlow will be automatically updated as well.
Lastly, new Capsule contacts can also be easily added to KashFlow when you are ready to raise an invoice.
How to set up the KashFlow integration
If you don’t already have a KashFlow account then sign up for one now at kashflow.com.
Before you can enable the integration in Capsule you need to make sure that API Access is enabled in your KashFlow account. To do that:
In the new KashFlow UI:
- Log in to KashFlow and click on Apps in the sidebar
- Click the API Settings button in the top right hand corner
- Check the Enabled box and use the Update button to save the changes.
In the old KashFlow UI:
- Log in to KashFlow and go to the Settings > API Settings
- Check the box enable the API for my KashFlow account and uncheck the box Only allow specific IP addresses to access my account via the API.
- Save the changes
When that is done it's time to setup the integration inside Capsule.
- Go to Account SettingsIntegrationsKashFlow and click the button to Configure KashFlow.
- Choose the option to Enable Integration. If you use teams in Capsule to control access to contact information, you can select a default team that all Kashflow contacts are added to.
- Click Connect to Kashflow and enter your KashFlow login details to give Capsule access to your KashFlow account. The integration is now up and running.
An initial sync takes place from KashFlow to Capsule, linking up existing Capsule contacts with their corresponding KashFlow contacts as well as adding any contacts not already existing in Capsule; as explained here.
Excluding KashFlow supplier invoices
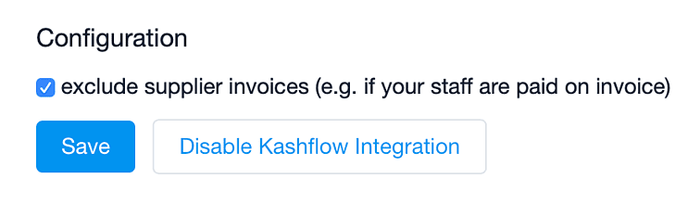
Suppliers can be treated differently to customers. If you’d prefer to not share supplier invoices with your users you can select to exclude their invoices from being displayed in Capsule.
Go to Account SettingsIntegrationsKashFlowSettings, check the box to exclude supplier invoices and click Save. The Supplier contacts will still show in Capsule but their invoices will not.
What happens during the KashFlow sync?
There are regular 2 hour syncs between KashFlow and Capsule. Where there's a new KashFlow contact, this contact will be uploaded into Capsule. At this point:
- If the contact doesn’t already exist in Capsule, a new contact will be created
- Those that can be matched by name will be automatically linked.
Exporting contacts from Capsule to KashFlow
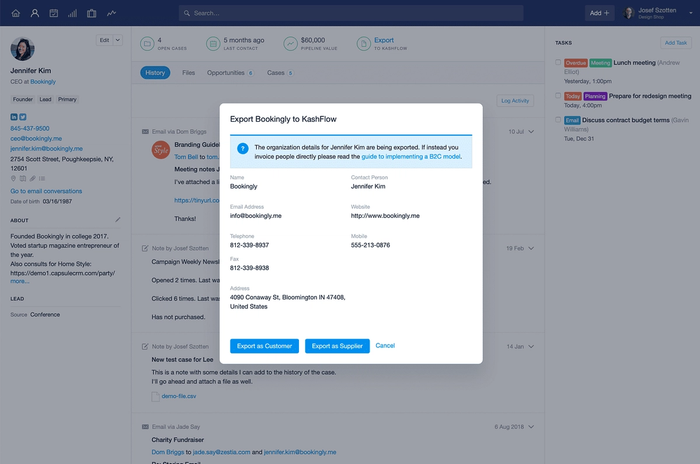
If you have a contact in Capsule not displaying any KashFlow information, and you want this contact in KashFlow, simply click on 'Export to KashFlow. This saves having to manually add this contact to KashFlow for invoicing.
Where an individual is linked to an organization in Capsule, it is expected you are wanting to invoice the organization not the individual. Capsule exports the organization, and the person record you are exporting from will be treated as the ‘Contact Person’ field in KashFlow. The following fields are populated in KashFlow from Capsule:
- Name of organization
- Contact Person (where export is from the person record in Capsule)
- First Email address
- Phone
- Phone [Fax]
- Phone [Mobile]
- Website
- First Address
Deleting and managing duplicates with KashFlow
Duplicates may occur because of the integration. If there is a slight difference in spelling of a contact between Capsule and KashFlow, the sync with treat the customer in KashFlow as new and create a duplicate contact in Capsule. If duplicates are accidentally created, you can merge them following the steps here. These need to be merged with the exact same name as what is stored in KashFlow, or KashFlow will continue to send the ‘new’ contact to Capsule.
Deleting a contact has to happen in both KashFlow and Capsule, in that order. Deleting a contact in Capsule first, without deleting the contact in KashFlow will mean that the contact will be added to Capsule again the next time the sync takes place. Because of this it is important to delete the contact in KashFlow and then delete it in Capsule.
Supplier and Customer Contacts in KashFlow you can be setup both with the same name. Capsule however requires that every organization record has a unique name and so when you enable the KashFlow integration in Capsule, only one of the duplicates will be created or synced with Capsule. In this situation we recommend that you rename one of the duplicates in KashFlow to ensure that they each have a unique name and therefore will sync correctly.
Using KashFlow as a B2B vs B2C Business
When dealing with people for the KashFlow integration we split contacts into B2C contacts (people not associated with an organization) and B2B contacts (people associated with an organization).
When exporting a B2C contact to KashFlow, the Person's details are exported to the accounting system. We are expecting invoices will be issued to this person. When exporting a B2B contact we export only the organization's details. We do this because in a B2B relationship invoices are almost always issued to an organization rather than a person.
When you use the option to Export to KashFlow from a Person's contact record, the first and last name for the Person is used in the 'Contact Person' field in KashFlow and all other details added to KashFlow will be from the Organization.
How to disable the Kashflow integration
To disconnect the Kashflow integration:
- Go to Account SettingsIntegrationsKashFlow and click the button to Configure Kashflow.
- Click to Disable Kashflow Integration and confirm.
Once the integration has been disabled, any invoice history and links to Kashflow will stop being displayed but Contacts created by the integration will remain in Capsule.